基于celeba数据集和pytorch框架实现dcgan的人脸图像生成
参考pytorch的官方教程实现了dcgan网络,对官方的实例进行了如下修改。
(1)把原来的script修组织成了类的形式,直接复制官方的代码无法直接运行,通过类的形式管理数据和函数更加方便
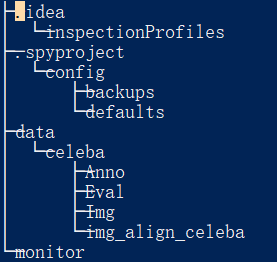
(2)添加了训练过程的图形化保存,官方给的实例中是pyplot的show的形式显示结果,改成了savefig的方式保存图像,训练过程的图像保存在monitor文件夹
(3)调用imagemagick的方式保存gif图,
(4)dcgan训练celeba数据集,该数据集下载后放在和dcgan.py相同的目录下,名词为data,包含celeba,而celeba包含Anno,Eval和img_align_celeba文件件,202599个人脸图像样本
全部代码如下:
# -*- coding: utf-8 -*-
"""
DCGAN Tutorial
==============
**Author**: `Nathan Inkawhich <https://github.com/inkawhich>`__
"""######################################################################
# Introduction
# ------------
#
# This tutorial will give an introduction to DCGANs through an example. We
# will train a generative adversarial network (GAN) to generate new
# celebrities after showing it pictures of many real celebrities. Most of
# the code here is from the dcgan implementation in
# `pytorch/examples <https://github.com/pytorch/examples>`__, and this
# document will give a thorough explanation of the implementation and shed
# light on how and why this model works. But don’t worry, no prior
# knowledge of GANs is required, but it may require a first-timer to spend
# some time reasoning about what is actually happening under the hood.
# Also, for the sake of time it will help to have a GPU, or two. Lets
# start from the beginning.
#
# Generative Adversarial Networks
# -------------------------------
#
# What is a GAN?
# ~~~~~~~~~~~~~~
#
# GANs are a framework for teaching a DL model to capture the training
# data’s distribution so we can generate new data from that same
# distribution. GANs were invented by Ian Goodfellow in 2014 and first
# described in the paper `Generative Adversarial
# Nets <https://papers.nips.cc/paper/5423-generative-adversarial-nets.pdf>`__.
# They are made of two distinct models, a *generator* and a
# *discriminator*. The job of the generator is to spawn ‘fake’ images that
# look like the training images. The job of the discriminator is to look
# at an image and output whether or not it is a real training image or a
# fake image from the generator. During training, the generator is
# constantly trying to outsmart the discriminator by generating better and
# better fakes, while the discriminator is working to become a better
# detective and correctly classify the real and fake images. The
# equilibrium of this game is when the generator is generating perfect
# fakes that look as if they came directly from the training data, and the
# discriminator is left to always guess at 50% confidence that the
# generator output is real or fake.
#
# Now, lets define some notation to be used throughout tutorial starting
# with the discriminator. Let :math:`x` be data representing an image.
# :math:`D(x)` is the discriminator network which outputs the (scalar)
# probability that :math:`x` came from training data rather than the
# generator. Here, since we are dealing with images the input to
# :math:`D(x)` is an image of CHW size 3x64x64. Intuitively, :math:`D(x)`
# should be HIGH when :math:`x` comes from training data and LOW when
# :math:`x` comes from the generator. :math:`D(x)` can also be thought of
# as a traditional binary classifier.
#
# For the generator’s notation, let :math:`z` be a latent space vector
# sampled from a standard normal distribution. :math:`G(z)` represents the
# generator function which maps the latent vector :math:`z` to data-space.
# The goal of :math:`G` is to estimate the distribution that the training
# data comes from (:math:`p_{data}`) so it can generate fake samples from
# that estimated distribution (:math:`p_g`).
#
# So, :math:`D(G(z))` is the probability (scalar) that the output of the
# generator :math:`G` is a real image. As described in `Goodfellow’s
# paper <https://papers.nips.cc/paper/5423-generative-adversarial-nets.pdf>`__,
# :math:`D` and :math:`G` play a minimax game in which :math:`D` tries to
# maximize the probability it correctly classifies reals and fakes
# (:math:`logD(x)`), and :math:`G` tries to minimize the probability that
# :math:`D` will predict its outputs are fake (:math:`log(1-D(G(x)))`).
# From the paper, the GAN loss function is
#
# .. math:: \underset{G}{\text{min}} \underset{D}{\text{max}}V(D,G) = \mathbb{E}_{x\sim p_{data}(x)}\big[logD(x)\big] + \mathbb{E}_{z\sim p_{z}(z)}\big[log(1-D(G(z)))\big]
#
# In theory, the solution to this minimax game is where
# :math:`p_g = p_{data}`, and the discriminator guesses randomly if the
# inputs are real or fake. However, the convergence theory of GANs is
# still being actively researched and in reality models do not always
# train to this point.
#
# What is a DCGAN?
# ~~~~~~~~~~~~~~~~
#
# A DCGAN is a direct extension of the GAN described above, except that it
# explicitly uses convolutional and convolutional-transpose layers in the
# discriminator and generator, respectively. It was first described by
# Radford et. al. in the paper `Unsupervised Representation Learning With
# Deep Convolutional Generative Adversarial
# Networks <https://arxiv.org/pdf/1511.06434.pdf>`__. The discriminator
# is made up of strided
# `convolution <https://pytorch.org/docs/stable/nn.html#torch.nn.Conv2d>`__
# layers, `batch
# norm <https://pytorch.org/docs/stable/nn.html#torch.nn.BatchNorm2d>`__
# layers, and
# `LeakyReLU <https://pytorch.org/docs/stable/nn.html#torch.nn.LeakyReLU>`__
# activations. The input is a 3x64x64 input image and the output is a
# scalar probability that the input is from the real data distribution.
# The generator is comprised of
# `convolutional-transpose <https://pytorch.org/docs/stable/nn.html#torch.nn.ConvTranspose2d>`__
# layers, batch norm layers, and
# `ReLU <https://pytorch.org/docs/stable/nn.html#relu>`__ activations. The
# input is a latent vector, :math:`z`, that is drawn from a standard
# normal distribution and the output is a 3x64x64 RGB image. The strided
# conv-transpose layers allow the latent vector to be transformed into a
# volume with the same shape as an image. In the paper, the authors also
# give some tips about how to setup the optimizers, how to calculate the
# loss functions, and how to initialize the model weights, all of which
# will be explained in the coming sections.
# from __future__ import print_function
#%matplotlib inline
import argparse
import os
import random
import torch
import torch.nn as nn
import torch.nn.parallel
import torch.backends.cudnn as cudnn
import torch.optim as optim
import torch.utils.data
import torchvision.datasets as dset
import torchvision.transforms as transforms
import torchvision.utils as vutils
import numpy as np
import matplotlib.pyplot as plt
import matplotlib.animation as animation
from IPython.display import HTMLdef setRandom():# Set random seed for reproducibilitymanualSeed = 999#manualSeed = random.randint(1, 10000) # use if you want new resultsprint("Random Seed: ", manualSeed)random.seed(manualSeed)torch.manual_seed(manualSeed)######################################################################
# Inputs
# ------
#
# Let’s define some inputs for the run:
#
# -  **dataroot** - the path to the root of the dataset folder. We will
#    talk more about the dataset in the next section
# -  **workers** - the number of worker threads for loading the data with
#    the DataLoader
# -  **batch_size** - the batch size used in training. The DCGAN paper
#    uses a batch size of 128
# -  **image_size** - the spatial size of the images used for training.
#    This implementation defaults to 64x64. If another size is desired,
#    the structures of D and G must be changed. See
#    `here <https://github.com/pytorch/examples/issues/70>`__ for more
#    details
# -  **nc** - number of color channels in the input images. For color
#    images this is 3
# -  **nz** - length of latent vector
# -  **ngf** - relates to the depth of feature maps carried through the
#    generator
# -  **ndf** - sets the depth of feature maps propagated through the
#    discriminator
# -  **num_epochs** - number of training epochs to run. Training for
#    longer will probably lead to better results but will also take much
#    longer
# -  **lr** - learning rate for training. As described in the DCGAN paper,
#    this number should be 0.0002
# -  **beta1** - beta1 hyperparameter for Adam optimizers. As described in
#    paper, this number should be 0.5
# -  **ngpu** - number of GPUs available. If this is 0, code will run in
#    CPU mode. If this number is greater than 0 it will run on that number
#    of GPUs
# # Root directory for dataset
dataroot = "data/celeba"# Number of workers for dataloader
workers = 2# Batch size during training
batch_size = 128# Spatial size of training images. All images will be resized to this
#   size using a transformer.
image_size = 64# Number of channels in the training images. For color images this is 3
nc = 3# Size of z latent vector (i.e. size of generator input)
nz = 100# Size of feature maps in generator
ngf = 64# Size of feature maps in discriminator
ndf = 64# Number of training epochs
num_epochs = 5# Learning rate for optimizers
lr = 0.0002# Beta1 hyperparam for Adam optimizers
beta1 = 0.5# Number of GPUs available. Use 0 for CPU mode.
ngpu = 1######################################################################
# Generator
# ~~~~~~~~~
#
# The generator, :math:`G`, is designed to map the latent space vector
# (:math:`z`) to data-space. Since our data are images, converting
# :math:`z` to data-space means ultimately creating a RGB image with the
# same size as the training images (i.e. 3x64x64). In practice, this is
# accomplished through a series of strided two dimensional convolutional
# transpose layers, each paired with a 2d batch norm layer and a relu
# activation. The output of the generator is fed through a tanh function
# to return it to the input data range of :math:`[-1,1]`. It is worth
# noting the existence of the batch norm functions after the
# conv-transpose layers, as this is a critical contribution of the DCGAN
# paper. These layers help with the flow of gradients during training. An
# image of the generator from the DCGAN paper is shown below.
#
# .. figure:: /_static/img/dcgan_generator.png
#    :alt: dcgan_generator
#
# Notice, the how the inputs we set in the input section (*nz*, *ngf*, and
# *nc*) influence the generator architecture in code. *nz* is the length
# of the z input vector, *ngf* relates to the size of the feature maps
# that are propagated through the generator, and *nc* is the number of
# channels in the output image (set to 3 for RGB images). Below is the
# code for the generator.
# # Generator Codeclass Generator(nn.Module):def __init__(self, ngpu):super(Generator, self).__init__()self.ngpu = ngpuself.main = nn.Sequential(# input is Z, going into a convolutionnn.ConvTranspose2d( nz, ngf * 8, 4, 1, 0, bias=False),nn.BatchNorm2d(ngf * 8),nn.ReLU(True),# state size. (ngf*8) x 4 x 4nn.ConvTranspose2d(ngf * 8, ngf * 4, 4, 2, 1, bias=False),nn.BatchNorm2d(ngf * 4),nn.ReLU(True),# state size. (ngf*4) x 8 x 8nn.ConvTranspose2d( ngf * 4, ngf * 2, 4, 2, 1, bias=False),nn.BatchNorm2d(ngf * 2),nn.ReLU(True),# state size. (ngf*2) x 16 x 16nn.ConvTranspose2d( ngf * 2, ngf, 4, 2, 1, bias=False),nn.BatchNorm2d(ngf),nn.ReLU(True),# state size. (ngf) x 32 x 32nn.ConvTranspose2d( ngf, nc, 4, 2, 1, bias=False),nn.Tanh()# state size. (nc) x 64 x 64)def forward(self, input):return self.main(input)######################################################################
# Discriminator
# ~~~~~~~~~~~~~
#
# As mentioned, the discriminator, :math:`D`, is a binary classification
# network that takes an image as input and outputs a scalar probability
# that the input image is real (as opposed to fake). Here, :math:`D` takes
# a 3x64x64 input image, processes it through a series of Conv2d,
# BatchNorm2d, and LeakyReLU layers, and outputs the final probability
# through a Sigmoid activation function. This architecture can be extended
# with more layers if necessary for the problem, but there is significance
# to the use of the strided convolution, BatchNorm, and LeakyReLUs. The
# DCGAN paper mentions it is a good practice to use strided convolution
# rather than pooling to downsample because it lets the network learn its
# own pooling function. Also batch norm and leaky relu functions promote
# healthy gradient flow which is critical for the learning process of both
# :math:`G` and :math:`D`.
# #########################################################################
# Discriminator Codeclass Discriminator(nn.Module):def __init__(self, ngpu):super(Discriminator, self).__init__()self.ngpu = ngpuself.main = nn.Sequential(# input is (nc) x 64 x 64nn.Conv2d(nc, ndf, 4, 2, 1, bias=False),nn.LeakyReLU(0.2, inplace=True),# state size. (ndf) x 32 x 32nn.Conv2d(ndf, ndf * 2, 4, 2, 1, bias=False),nn.BatchNorm2d(ndf * 2),nn.LeakyReLU(0.2, inplace=True),# state size. (ndf*2) x 16 x 16nn.Conv2d(ndf * 2, ndf * 4, 4, 2, 1, bias=False),nn.BatchNorm2d(ndf * 4),nn.LeakyReLU(0.2, inplace=True),# state size. (ndf*4) x 8 x 8nn.Conv2d(ndf * 4, ndf * 8, 4, 2, 1, bias=False),nn.BatchNorm2d(ndf * 8),nn.LeakyReLU(0.2, inplace=True),# state size. (ndf*8) x 4 x 4nn.Conv2d(ndf * 8, 1, 4, 1, 0, bias=False),nn.Sigmoid())def forward(self, input):return self.main(input)class DCGAN:####################################################################### Data# ----# # In this tutorial we will use the `Celeb-A Faces# dataset <http://mmlab.ie.cuhk.edu.hk/projects/CelebA.html>`__ which can# be downloaded at the linked site, or in `Google# Drive <https://drive.google.com/drive/folders/0B7EVK8r0v71pTUZsaXdaSnZBZzg>`__.# The dataset will download as a file named *img_align_celeba.zip*. Once# downloaded, create a directory named *celeba* and extract the zip file# into that directory. Then, set the *dataroot* input for this notebook to# the *celeba* directory you just created. The resulting directory# structure should be:# # ::# #    /path/to/celeba#        -> img_align_celeba  #            -> 188242.jpg#            -> 173822.jpg#            -> 284702.jpg#            -> 537394.jpg#               ...# # This is an important step because we will be using the ImageFolder# dataset class, which requires there to be subdirectories in the# dataset’s root folder. Now, we can create the dataset, create the# dataloader, set the device to run on, and finally visualize some of the# training data.# def prepareData(self):# We can use an image folder dataset the way we have it setup.# Create the datasetself.dataset = dset.ImageFolder(root=dataroot,transform=transforms.Compose([transforms.Resize(image_size),transforms.CenterCrop(image_size),transforms.ToTensor(),transforms.Normalize((0.5, 0.5, 0.5), (0.5, 0.5, 0.5)),]))# Create the dataloaderself.dataloader = torch.utils.data.DataLoader(self.dataset, batch_size=batch_size,shuffle=True, num_workers=workers)# Decide which device we want to run onself.device = torch.device("cuda:0" if (torch.cuda.is_available() and ngpu > 0) else "cpu")# Plot some training imagesreal_batch = next(iter(self.dataloader))plt.figure(figsize=(8,8))plt.axis("off")plt.title("Training Images")plt.imshow(np.transpose(vutils.make_grid(real_batch[0].to(self.device)[:64], padding=2, normalize=True).cpu(),(1,2,0)))####################################################################### Implementation# --------------# # With our input parameters set and the dataset prepared, we can now get# into the implementation. We will start with the weigth initialization# strategy, then talk about the generator, discriminator, loss functions,# and training loop in detail.# # Weight Initialization# ~~~~~~~~~~~~~~~~~~~~~# # From the DCGAN paper, the authors specify that all model weights shall# be randomly initialized from a Normal distribution with mean=0,# stdev=0.02. The ``weights_init`` function takes an initialized model as# input and reinitializes all convolutional, convolutional-transpose, and# batch normalization layers to meet this criteria. This function is# applied to the models immediately after initialization.# # custom weights initialization called on netG and netDdef weights_init(self, m):classname = m.__class__.__name__if classname.find('Conv') != -1:nn.init.normal_(m.weight.data, 0.0, 0.02)elif classname.find('BatchNorm') != -1:nn.init.normal_(m.weight.data, 1.0, 0.02)nn.init.constant_(m.bias.data, 0)def createGen(self):####################################################################### Now, we can instantiate the generator and apply the ``weights_init``# function. Check out the printed model to see how the generator object is# structured.# # Create the generatorself.netG = Generator(ngpu).to(self.device)# Handle multi-gpu if desiredif (self.device.type == 'cuda') and (ngpu > 1):self.netG = nn.DataParallel(self.netG, list(range(ngpu)))# Apply the weights_init function to randomly initialize all weights#  to mean=0, stdev=0.2.self.netG.apply(self.weights_init)# Print the modelprint(self.netG)def createDis(self):####################################################################### Now, as with the generator, we can create the discriminator, apply the# ``weights_init`` function, and print the model’s structure.# # Create the Discriminatorself.netD = Discriminator(ngpu).to(self.device)# Handle multi-gpu if desiredif (self.device.type == 'cuda') and (ngpu > 1):self.netD = nn.DataParallel(self.netD, list(range(ngpu)))# Apply the weights_init function to randomly initialize all weights#  to mean=0, stdev=0.2.self.netD.apply(self.weights_init)# Print the modelprint(self.netD)def setLossAndOptimizer(self):####################################################################### Loss Functions and Optimizers# ~~~~~~~~~~~~~~~~~~~~~~~~~~~~~# # With :math:`D` and :math:`G` setup, we can specify how they learn# through the loss functions and optimizers. We will use the Binary Cross# Entropy loss# (`BCELoss <https://pytorch.org/docs/stable/nn.html#torch.nn.BCELoss>`__)# function which is defined in PyTorch as:# # .. math:: \ell(x, y) = L = \{l_1,\dots,l_N\}^\top, \quad l_n = - \left[ y_n \cdot \log x_n + (1 - y_n) \cdot \log (1 - x_n) \right]# # Notice how this function provides the calculation of both log components# in the objective function (i.e. :math:`log(D(x))` and# :math:`log(1-D(G(z)))`). We can specify what part of the BCE equation to# use with the :math:`y` input. This is accomplished in the training loop# which is coming up soon, but it is important to understand how we can# choose which component we wish to calculate just by changing :math:`y`# (i.e. GT labels).# # Next, we define our real label as 1 and the fake label as 0. These# labels will be used when calculating the losses of :math:`D` and# :math:`G`, and this is also the convention used in the original GAN# paper. Finally, we set up two separate optimizers, one for :math:`D` and# one for :math:`G`. As specified in the DCGAN paper, both are Adam# optimizers with learning rate 0.0002 and Beta1 = 0.5. For keeping track# of the generator’s learning progression, we will generate a fixed batch# of latent vectors that are drawn from a Gaussian distribution# (i.e. fixed_noise) . In the training loop, we will periodically input# this fixed_noise into :math:`G`, and over the iterations we will see# images form out of the noise.# # Initialize BCELoss functionself.criterion = nn.BCELoss()# Create batch of latent vectors that we will use to visualize#  the progression of the generatorself.fixed_noise = torch.randn(64, nz, 1, 1, device=self.device)# Establish convention for real and fake labels during trainingself.real_label = 1.self.fake_label = 0.# Setup Adam optimizers for both G and Dself.optimizerD = optim.Adam(self.netD.parameters(), lr=lr, betas=(beta1, 0.999))self.optimizerG = optim.Adam(self.netG.parameters(), lr=lr, betas=(beta1, 0.999))def train(self):####################################################################### Training# ~~~~~~~~# # Finally, now that we have all of the parts of the GAN framework defined,# we can train it. Be mindful that training GANs is somewhat of an art# form, as incorrect hyperparameter settings lead to mode collapse with# little explanation of what went wrong. Here, we will closely follow# Algorithm 1 from Goodfellow’s paper, while abiding by some of the best# practices shown in `ganhacks <https://github.com/soumith/ganhacks>`__.# Namely, we will “construct different mini-batches for real and fake”# images, and also adjust G’s objective function to maximize# :math:`logD(G(z))`. Training is split up into two main parts. Part 1# updates the Discriminator and Part 2 updates the Generator.# # **Part 1 - Train the Discriminator**# # Recall, the goal of training the discriminator is to maximize the# probability of correctly classifying a given input as real or fake. In# terms of Goodfellow, we wish to “update the discriminator by ascending# its stochastic gradient”. Practically, we want to maximize# :math:`log(D(x)) + log(1-D(G(z)))`. Due to the separate mini-batch# suggestion from ganhacks, we will calculate this in two steps. First, we# will construct a batch of real samples from the training set, forward# pass through :math:`D`, calculate the loss (:math:`log(D(x))`), then# calculate the gradients in a backward pass. Secondly, we will construct# a batch of fake samples with the current generator, forward pass this# batch through :math:`D`, calculate the loss (:math:`log(1-D(G(z)))`),# and *accumulate* the gradients with a backward pass. Now, with the# gradients accumulated from both the all-real and all-fake batches, we# call a step of the Discriminator’s optimizer.# # **Part 2 - Train the Generator**# # As stated in the original paper, we want to train the Generator by# minimizing :math:`log(1-D(G(z)))` in an effort to generate better fakes.# As mentioned, this was shown by Goodfellow to not provide sufficient# gradients, especially early in the learning process. As a fix, we# instead wish to maximize :math:`log(D(G(z)))`. In the code we accomplish# this by: classifying the Generator output from Part 1 with the# Discriminator, computing G’s loss *using real labels as GT*, computing# G’s gradients in a backward pass, and finally updating G’s parameters# with an optimizer step. It may seem counter-intuitive to use the real# labels as GT labels for the loss function, but this allows us to use the# :math:`log(x)` part of the BCELoss (rather than the :math:`log(1-x)`# part) which is exactly what we want.# # Finally, we will do some statistic reporting and at the end of each# epoch we will push our fixed_noise batch through the generator to# visually track the progress of G’s training. The training statistics# reported are:# # -  **Loss_D** - discriminator loss calculated as the sum of losses for#    the all real and all fake batches (:math:`log(D(x)) + log(D(G(z)))`).# -  **Loss_G** - generator loss calculated as :math:`log(D(G(z)))`# -  **D(x)** - the average output (across the batch) of the discriminator#    for the all real batch. This should start close to 1 then#    theoretically converge to 0.5 when G gets better. Think about why#    this is.# -  **D(G(z))** - average discriminator outputs for the all fake batch.#    The first number is before D is updated and the second number is#    after D is updated. These numbers should start near 0 and converge to#    0.5 as G gets better. Think about why this is.# # **Note:** This step might take a while, depending on how many epochs you# run and if you removed some data from the dataset.# # Training Loop# Lists to keep track of progressself.img_list = []self.G_losses = []self.D_losses = []iters = 0print("Starting Training Loop...")# For each epochfor epoch in range(num_epochs):# For each batch in the dataloaderfor i, data in enumerate(self.dataloader, 0):############################# (1) Update D network: maximize log(D(x)) + log(1 - D(G(z)))############################# Train with all-real batchself.netD.zero_grad()# Format batchreal_cpu = data[0].to(self.device)b_size = real_cpu.size(0)label = torch.full((b_size,), self.real_label, dtype=torch.float, device=self.device)# Forward pass real batch through Doutput = self.netD(real_cpu).view(-1)# Calculate loss on all-real batcherrD_real = self.criterion(output, label)# Calculate gradients for D in backward passerrD_real.backward()D_x = output.mean().item()## Train with all-fake batch# Generate batch of latent vectorsnoise = torch.randn(b_size, nz, 1, 1, device=self.device)# Generate fake image batch with Gfake = self.netG(noise)label.fill_(self.fake_label)# Classify all fake batch with Doutput = self.netD(fake.detach()).view(-1)# Calculate D's loss on the all-fake batcherrD_fake = self.criterion(output, label)# Calculate the gradients for this batcherrD_fake.backward()D_G_z1 = output.mean().item()# Add the gradients from the all-real and all-fake batcheserrD = errD_real + errD_fake# Update Dself.optimizerD.step()############################# (2) Update G network: maximize log(D(G(z)))###########################self.netG.zero_grad()label.fill_(self.real_label)  # fake labels are real for generator cost# Since we just updated D, perform another forward pass of all-fake batch through Doutput = self.netD(fake).view(-1)# Calculate G's loss based on this outputerrG = self.criterion(output, label)# Calculate gradients for GerrG.backward()D_G_z2 = output.mean().item()# Update Gself.optimizerG.step()# Output training statsif i % 50 == 0:print('[%d/%d][%d/%d]\tLoss_D: %.4f\tLoss_G: %.4f\tD(x): %.4f\tD(G(z)): %.4f / %.4f'% (epoch, num_epochs, i, len(self.dataloader),errD.item(), errG.item(), D_x, D_G_z1, D_G_z2))# Save Losses for plotting laterself.G_losses.append(errG.item())self.D_losses.append(errD.item())# Check how the generator is doing by saving G's output on fixed_noiseif (iters % 500 == 0) or ((epoch == num_epochs-1) and (i == len(self.dataloader)-1)):with torch.no_grad():fake = self.netG(self.fixed_noise).detach().cpu()self.img_list.append(vutils.make_grid(fake, padding=2, normalize=True))#save the plottrain_loss_filename='.\monitor\epoch_'+str(epoch)+'_batch_'+str(i)+'_trainloss.jpg'self.plotSaveTrainLoss(train_loss_filename)gen_progression_filename='.\monitor\epoch_'+str(epoch)+'_batch_'+str(i)+'_gprogression.gif'self.plotSaveGprogression(gen_progression_filename)real_vs_fake_image_filename='.\monitor\epoch_'+str(epoch)+'_batch_'+str(i)+'_read_vs_fake_image.jpg'self.plotSaveRealFakeImage(real_vs_fake_image_filename)iters += 1def plotSaveTrainLoss(self, pic_filename):####################################################################### Results# -------# # Finally, lets check out how we did. Here, we will look at three# different results. First, we will see how D and G’s losses changed# during training. Second, we will visualize G’s output on the fixed_noise# batch for every epoch. And third, we will look at a batch of real data# next to a batch of fake data from G.# # **Loss versus training iteration**# # Below is a plot of D & G’s losses versus training iterations.# plt.figure(figsize=(10,5))plt.title("Generator and Discriminator Loss During Training")plt.plot(self.G_losses,label="G")plt.plot(self.D_losses,label="D")plt.xlabel("iterations")plt.ylabel("Loss")plt.legend()#plt.show()plt.savefig(pic_filename)def plotSaveGprogression(self, gif_filename):####################################################################### **Visualization of G’s progression**# # Remember how we saved the generator’s output on the fixed_noise batch# after every epoch of training. Now, we can visualize the training# progression of G with an animation. Press the play button to start the# animation.# #%%capturefig = plt.figure(figsize=(8,8))plt.axis("off")ims = [[plt.imshow(np.transpose(i,(1,2,0)), animated=True)] for i in self.img_list]ani = animation.ArtistAnimation(fig, ims, interval=1000, repeat_delay=1000, blit=True)ani.save(gif_filename, writer='imagemagick')#HTML(ani.to_jshtml())def plotSaveRealFakeImage(self, pic_filename):####################################################################### **Real Images vs. Fake Images**# # Finally, lets take a look at some real images and fake images side by# side.# # Grab a batch of real images from the dataloaderreal_batch = next(iter(self.dataloader))# Plot the real imagesplt.figure(figsize=(15,15))plt.subplot(1,2,1)plt.axis("off")plt.title("Real Images")plt.imshow(np.transpose(vutils.make_grid(real_batch[0].to(self.device)[:64], padding=5, normalize=True).cpu(),(1,2,0)))# Plot the fake images from the last epochplt.subplot(1,2,2)plt.axis("off")plt.title("Fake Images")plt.imshow(np.transpose(self.img_list[-1],(1,2,0)))plt.savefig(pic_filename)#plt.show()####################################################################### Where to Go Next# ----------------# # We have reached the end of our journey, but there are several places you# could go from here. You could:# # -  Train for longer to see how good the results get# -  Modify this model to take a different dataset and possibly change the#    size of the images and the model architecture# -  Check out some other cool GAN projects#    `here <https://github.com/nashory/gans-awesome-applications>`__# -  Create GANs that generate#    `music <https://deepmind.com/blog/wavenet-generative-model-raw-audio/>`__# if __name__=='__main__':setRandom()dcgan=DCGAN()dcgan.prepareData()dcgan.createGen()dcgan.createDis()dcgan.setLossAndOptimizer()dcgan.train()
该程序充分调用gpu进行训练

训练过程如下:

训练结果如下:


如若内容造成侵权/违法违规/事实不符,请联系编程学习网邮箱:809451989@qq.com进行投诉反馈,一经查实,立即删除!
相关文章
- MySQL函数(一)
一、数学函数 1.ASB(X) 描述:返回X的绝对值 应用:SELECT ABS(-1) 2.MOD(N,M) 描述:模运算。返回N除以M的余数 应用:SELECT MOD(10,3) 3.ROUND(X),(X,D) 描述:保留小数点位数。X代表实际值,D代表小数点位数。默认使用…...
2024/4/9 23:11:19 - HBase读写流程详解
HBase架构图 Region Server Region Server 为 Region 的管理者,其实现类为 HRegionServer,主要作用如下: 对于数据的操作:get, put, delete; 对于 Region 的操作:splitRegion、compactRegion。Master Master 是所有 Re…...
2024/4/6 9:15:00 - 2020-串作业
7-1 串的模式匹配 给定两个由英文字母组成的字符串 String 和 Pattern,要求找到 Pattern 在 String 中第一次出现的位置,并将此位置后的 String 的子串输出。如果找不到,则输出“Not Found”。 本题旨在测试各种不同的匹配算法在各种数据情…...
2024/4/23 1:41:00 - 2020-10-18C++笔记之C/C++之字符串赋值
C笔记之C/C之字符串赋值 C 序号函数 & 目的1strcpy(s1, s2); 复制字符串 s2 到字符串 s1。2strcat(s1, s2); 连接字符串 s2 到字符串 s1 的末尾。3strlen(s1); 返回字符串 s1 的长度。4strcmp(s1, s2); 如果 s1 和 s2 是相同的,则返回 0;如果 s1&l…...
2024/4/6 9:14:59 - 正则-元字符
何为元字符 通俗来说:指在正则表达式中具有特殊意义的专用字符,元字符是构成正则表达式的基本元件。正则就是由一系列的元字符组成。 元字符的分类 首先,我们可以把元字符分成几类:表示单个特殊字符的,表示空白符的…...
2024/4/6 9:14:57 - Oracle中alter system命令参数之scope
SCOPE The SCOPE clause lets you specify when the change takes effect. Scope depends on whether you started up the database using a client-side parameter file (pfile) or server parameter file (spfile). scope可指定对system的修改何时生效,scopememor…...
2024/4/23 17:53:48 - 百度霸屏什么意思?如何实现百度霸屏!
很多人问我,百度霸屏是什么意思?如何实现百度霸屏呢?那么,今天就和大家讲讲关于如何做到霸屏霸屏这方面的知识技术!请往下看! 一、百度霸屏什么意思? 百度霸屏的意思就是在百度搜索引擎第一页或…...
2024/4/6 9:14:56 - (20200915Solved)Vscode出现Unable to open ‘hashtable_class_helper.pxi‘
问题描述 Unable to open ‘hashtable_class_helper.pxi’: Unable to read file ‘vscode-remote://ssh-remotedata1/home/data/anaconda3/lib/python3.7/site-packages/pandas/_libs/hashtable_class_helper.pxi’ (Error: Unable to resolve non-existing file ‘vscode-rem…...
2024/4/6 9:14:55 - 【Java集合】1 集合概述
Q:Java 中常用的集合有哪些? Java 集合分为 Collection 和 Map Collection Colletion 包括 List、Set、Queue List:有序集合,允许有重复元素,主要实现类有 Vector:线程安全的动态数组ArrayList…...
2024/4/6 9:14:53 - 洛谷P1297 [国家集训队]单选错位
题目描述 在洛谷上使用团队系统非常方便的添加自己的题目。如果在自己的电脑上配置题目和测试数据,每题需要花费时间 5 分钟;而在洛谷团队中上传私有题目,每题只需要花费 3 分钟,但是上传题目之前还需要一次性花费 11 分钟创建与配…...
2024/4/6 9:14:54 - 预训练模型 Fine-tuning
https://blog.csdn.net/weixin_42137700/article/details/82107208 https://zhuanlan.zhihu.com/p/46833276 在实践中,由于数据集不够大,很少有人从头开始训练网络。常见的做法是使用预训练的网络(例如在ImageNet上训练的分类1000类的网络&…...
2024/4/24 6:31:52 - 2020.10.11-参加CSP-J初赛(通过进入复赛)
10月1-8日,经历了一个算是较长的假日。在外出旅游归来后的第一个周末,京城众多学信息学的孩子参加了一年一度的由中国计算机学会CCF举办的 CSP 比赛。 今年 Jensen参加的依然是J级别普及组的比赛,和去年相比,有进步,分…...
2024/4/10 3:50:32 - Mat调用C++代码阶段性总结
第一:环境: (1)VS 2017 (2) MATLAB 2017a 第二: 首先打开VS2017创建.dll文件; 2.1 按照下方步骤创建.dll文件 然后,把下列代码分别粘贴进去(测试代码&…...
2024/4/6 9:14:49 - 快照回档是什么意思?如何解决网站快照回档问题!
很多都在问我网站快照突然就回档了,快照日期回到了一个月前了,甚至几个月前了,很慌,不知道怎么办才好,发现网站也降权了,网站收录也慢了,词库也是处于下降状态!这种快照回档的问题&a…...
2024/4/25 9:12:14 - Mac下关闭虚拟环境base和创建虚拟环境venu
1.关闭 base 环境 conda config --set auto_activate_base false 2.在文件下下建立 venu 虚拟环境 到第四步即可...
2024/4/6 9:14:47 - java通过JDBC对数据库进行查询
先下载一个jar包,导入项目中。 下载链接:https://dev.mysql.com/downloads/connector/j/ 导入项目中,如下 右击之后出现Build path选择,再点击Add to Build Path就创建好了。 创建JDBC进行数据库的操作主要为六个步骤:…...
2024/4/11 18:38:08 - 433M超再生无线模块编码-解码
433M超再生无线模块编码-解码摘要结构图数据帧结构编码1.宏定义脉冲宽度2.定时器初值3.数据帧结构3.1 同步头3.2 发送数据解码1.定时器中断接收2.解码过程源码获取摘要 超再生技术是直放式的一种,是利用正反馈原理,把经过放大了的信息回馈到输入端&…...
2024/4/6 6:40:41 - TCP三次握手的简述
简述TCP协议的三次握手过程,以及序列号和确认号的作用。 答:(1)在TCP/IP协议中,TCP协议提供可靠的连接服务,采用三次握手建立一个连接. 第一次握手:建立连接时,客户端发送syn包(synj)到服务器,并进入SYN_SEND状态,等待服务器确认࿱…...
2024/4/6 6:40:40 - spring中bean生命周期
Bean 容器找到配置文件中 Spring Bean 的定义。Bean 容器利用 Java Reflection API 创建一个Bean的实例。如果涉及到一些属性值 利用 set()方法设置一些属性值。如果 Bean 实现了 BeanNameAware 接口,调用 setBeanName()方法,传入Bean的名字。如果 Bean …...
2024/4/8 0:58:54 - c++中的默认类型装换检测
进行short和char和float与其他类型计算时,先变为int或double然后在变回来。而进行纵向的计算时,低层的数据会被默认转化为高层的数据。 数据类型的检测: #include <iostream> #include <typeinfo> using namespace std; main()…...
2024/4/6 9:14:46
最新文章
- 了解常见的启发式算法
目录 前言1. 基本知识2. 基本算法 前言 主要讲解什么事启发式算法,以及基本的启发式算法有什么 1. 基本知识 启发式算法是一类解决复杂问题的计算方法,通常用于在大规模搜索空间中找到较好的解决方案,而不是通过穷举搜索所有可能的解 核心…...
2024/4/28 21:22:02 - 梯度消失和梯度爆炸的一些处理方法
在这里是记录一下梯度消失或梯度爆炸的一些处理技巧。全当学习总结了如有错误还请留言,在此感激不尽。 权重和梯度的更新公式如下: w w − η ⋅ ∇ w w w - \eta \cdot \nabla w ww−η⋅∇w 个人通俗的理解梯度消失就是网络模型在反向求导的时候出…...
2024/3/20 10:50:27 - 解析大语言模型训练三阶段
大语言模型的训练过程一般包括3个阶段:预训练(Pre-training)、SFT(有监督的微调,Supervised-Finetuning)以及RLHF(基于人类反馈的强化学习,Reinforcement Learning from Human Feedb…...
2024/4/23 6:25:26 - K8S容器空间不足问题分析和解决
如上图,今天测试环境的K8S平台出现了一个问题,其中的一个容器报错:Free disk space below threshold. Available: 3223552 bytes (threshold: 10485760B),意思服务器硬盘空间不够了。这个问题怎么产生的,又怎么解决的呢…...
2024/4/23 6:25:22 - 416. 分割等和子集问题(动态规划)
题目 题解 class Solution:def canPartition(self, nums: List[int]) -> bool:# badcaseif not nums:return True# 不能被2整除if sum(nums) % 2 ! 0:return False# 状态定义:dp[i][j]表示当背包容量为j,用前i个物品是否正好可以将背包填满ÿ…...
2024/4/28 4:04:40 - 【Java】ExcelWriter自适应宽度工具类(支持中文)
工具类 import org.apache.poi.ss.usermodel.Cell; import org.apache.poi.ss.usermodel.CellType; import org.apache.poi.ss.usermodel.Row; import org.apache.poi.ss.usermodel.Sheet;/*** Excel工具类** author xiaoming* date 2023/11/17 10:40*/ public class ExcelUti…...
2024/4/28 12:01:04 - Spring cloud负载均衡@LoadBalanced LoadBalancerClient
LoadBalance vs Ribbon 由于Spring cloud2020之后移除了Ribbon,直接使用Spring Cloud LoadBalancer作为客户端负载均衡组件,我们讨论Spring负载均衡以Spring Cloud2020之后版本为主,学习Spring Cloud LoadBalance,暂不讨论Ribbon…...
2024/4/28 16:34:55 - TSINGSEE青犀AI智能分析+视频监控工业园区周界安全防范方案
一、背景需求分析 在工业产业园、化工园或生产制造园区中,周界防范意义重大,对园区的安全起到重要的作用。常规的安防方式是采用人员巡查,人力投入成本大而且效率低。周界一旦被破坏或入侵,会影响园区人员和资产安全,…...
2024/4/28 18:31:47 - VB.net WebBrowser网页元素抓取分析方法
在用WebBrowser编程实现网页操作自动化时,常要分析网页Html,例如网页在加载数据时,常会显示“系统处理中,请稍候..”,我们需要在数据加载完成后才能继续下一步操作,如何抓取这个信息的网页html元素变化&…...
2024/4/28 12:01:03 - 【Objective-C】Objective-C汇总
方法定义 参考:https://www.yiibai.com/objective_c/objective_c_functions.html Objective-C编程语言中方法定义的一般形式如下 - (return_type) method_name:( argumentType1 )argumentName1 joiningArgument2:( argumentType2 )argumentName2 ... joiningArgu…...
2024/4/28 12:01:03 - 【洛谷算法题】P5713-洛谷团队系统【入门2分支结构】
👨💻博客主页:花无缺 欢迎 点赞👍 收藏⭐ 留言📝 加关注✅! 本文由 花无缺 原创 收录于专栏 【洛谷算法题】 文章目录 【洛谷算法题】P5713-洛谷团队系统【入门2分支结构】🌏题目描述🌏输入格…...
2024/4/28 12:01:03 - 【ES6.0】- 扩展运算符(...)
【ES6.0】- 扩展运算符... 文章目录 【ES6.0】- 扩展运算符...一、概述二、拷贝数组对象三、合并操作四、参数传递五、数组去重六、字符串转字符数组七、NodeList转数组八、解构变量九、打印日志十、总结 一、概述 **扩展运算符(...)**允许一个表达式在期望多个参数࿰…...
2024/4/28 16:07:14 - 摩根看好的前智能硬件头部品牌双11交易数据极度异常!——是模式创新还是饮鸩止渴?
文 | 螳螂观察 作者 | 李燃 双11狂欢已落下帷幕,各大品牌纷纷晒出优异的成绩单,摩根士丹利投资的智能硬件头部品牌凯迪仕也不例外。然而有爆料称,在自媒体平台发布霸榜各大榜单喜讯的凯迪仕智能锁,多个平台数据都表现出极度异常…...
2024/4/27 21:08:20 - Go语言常用命令详解(二)
文章目录 前言常用命令go bug示例参数说明 go doc示例参数说明 go env示例 go fix示例 go fmt示例 go generate示例 总结写在最后 前言 接着上一篇继续介绍Go语言的常用命令 常用命令 以下是一些常用的Go命令,这些命令可以帮助您在Go开发中进行编译、测试、运行和…...
2024/4/28 9:00:42 - 用欧拉路径判断图同构推出reverse合法性:1116T4
http://cplusoj.com/d/senior/p/SS231116D 假设我们要把 a a a 变成 b b b,我们在 a i a_i ai 和 a i 1 a_{i1} ai1 之间连边, b b b 同理,则 a a a 能变成 b b b 的充要条件是两图 A , B A,B A,B 同构。 必要性显然࿰…...
2024/4/27 18:40:35 - 【NGINX--1】基础知识
1、在 Debian/Ubuntu 上安装 NGINX 在 Debian 或 Ubuntu 机器上安装 NGINX 开源版。 更新已配置源的软件包信息,并安装一些有助于配置官方 NGINX 软件包仓库的软件包: apt-get update apt install -y curl gnupg2 ca-certificates lsb-release debian-…...
2024/4/28 4:14:21 - Hive默认分割符、存储格式与数据压缩
目录 1、Hive默认分割符2、Hive存储格式3、Hive数据压缩 1、Hive默认分割符 Hive创建表时指定的行受限(ROW FORMAT)配置标准HQL为: ... ROW FORMAT DELIMITED FIELDS TERMINATED BY \u0001 COLLECTION ITEMS TERMINATED BY , MAP KEYS TERMI…...
2024/4/27 13:52:15 - 【论文阅读】MAG:一种用于航天器遥测数据中有效异常检测的新方法
文章目录 摘要1 引言2 问题描述3 拟议框架4 所提出方法的细节A.数据预处理B.变量相关分析C.MAG模型D.异常分数 5 实验A.数据集和性能指标B.实验设置与平台C.结果和比较 6 结论 摘要 异常检测是保证航天器稳定性的关键。在航天器运行过程中,传感器和控制器产生大量周…...
2024/4/27 13:38:13 - --max-old-space-size=8192报错
vue项目运行时,如果经常运行慢,崩溃停止服务,报如下错误 FATAL ERROR: CALL_AND_RETRY_LAST Allocation failed - JavaScript heap out of memory 因为在 Node 中,通过JavaScript使用内存时只能使用部分内存(64位系统&…...
2024/4/28 12:00:58 - 基于深度学习的恶意软件检测
恶意软件是指恶意软件犯罪者用来感染个人计算机或整个组织的网络的软件。 它利用目标系统漏洞,例如可以被劫持的合法软件(例如浏览器或 Web 应用程序插件)中的错误。 恶意软件渗透可能会造成灾难性的后果,包括数据被盗、勒索或网…...
2024/4/28 12:00:58 - JS原型对象prototype
让我简单的为大家介绍一下原型对象prototype吧! 使用原型实现方法共享 1.构造函数通过原型分配的函数是所有对象所 共享的。 2.JavaScript 规定,每一个构造函数都有一个 prototype 属性,指向另一个对象,所以我们也称为原型对象…...
2024/4/27 22:51:49 - C++中只能有一个实例的单例类
C中只能有一个实例的单例类 前面讨论的 President 类很不错,但存在一个缺陷:无法禁止通过实例化多个对象来创建多名总统: President One, Two, Three; 由于复制构造函数是私有的,其中每个对象都是不可复制的,但您的目…...
2024/4/28 7:31:46 - python django 小程序图书借阅源码
开发工具: PyCharm,mysql5.7,微信开发者工具 技术说明: python django html 小程序 功能介绍: 用户端: 登录注册(含授权登录) 首页显示搜索图书,轮播图࿰…...
2024/4/28 8:32:05 - 电子学会C/C++编程等级考试2022年03月(一级)真题解析
C/C++等级考试(1~8级)全部真题・点这里 第1题:双精度浮点数的输入输出 输入一个双精度浮点数,保留8位小数,输出这个浮点数。 时间限制:1000 内存限制:65536输入 只有一行,一个双精度浮点数。输出 一行,保留8位小数的浮点数。样例输入 3.1415926535798932样例输出 3.1…...
2024/4/27 20:28:35 - 配置失败还原请勿关闭计算机,电脑开机屏幕上面显示,配置失败还原更改 请勿关闭计算机 开不了机 这个问题怎么办...
解析如下:1、长按电脑电源键直至关机,然后再按一次电源健重启电脑,按F8健进入安全模式2、安全模式下进入Windows系统桌面后,按住“winR”打开运行窗口,输入“services.msc”打开服务设置3、在服务界面,选中…...
2022/11/19 21:17:18 - 错误使用 reshape要执行 RESHAPE,请勿更改元素数目。
%读入6幅图像(每一幅图像的大小是564*564) f1 imread(WashingtonDC_Band1_564.tif); subplot(3,2,1),imshow(f1); f2 imread(WashingtonDC_Band2_564.tif); subplot(3,2,2),imshow(f2); f3 imread(WashingtonDC_Band3_564.tif); subplot(3,2,3),imsho…...
2022/11/19 21:17:16 - 配置 已完成 请勿关闭计算机,win7系统关机提示“配置Windows Update已完成30%请勿关闭计算机...
win7系统关机提示“配置Windows Update已完成30%请勿关闭计算机”问题的解决方法在win7系统关机时如果有升级系统的或者其他需要会直接进入一个 等待界面,在等待界面中我们需要等待操作结束才能关机,虽然这比较麻烦,但是对系统进行配置和升级…...
2022/11/19 21:17:15 - 台式电脑显示配置100%请勿关闭计算机,“准备配置windows 请勿关闭计算机”的解决方法...
有不少用户在重装Win7系统或更新系统后会遇到“准备配置windows,请勿关闭计算机”的提示,要过很久才能进入系统,有的用户甚至几个小时也无法进入,下面就教大家这个问题的解决方法。第一种方法:我们首先在左下角的“开始…...
2022/11/19 21:17:14 - win7 正在配置 请勿关闭计算机,怎么办Win7开机显示正在配置Windows Update请勿关机...
置信有很多用户都跟小编一样遇到过这样的问题,电脑时发现开机屏幕显现“正在配置Windows Update,请勿关机”(如下图所示),而且还需求等大约5分钟才干进入系统。这是怎样回事呢?一切都是正常操作的,为什么开时机呈现“正…...
2022/11/19 21:17:13 - 准备配置windows 请勿关闭计算机 蓝屏,Win7开机总是出现提示“配置Windows请勿关机”...
Win7系统开机启动时总是出现“配置Windows请勿关机”的提示,没过几秒后电脑自动重启,每次开机都这样无法进入系统,此时碰到这种现象的用户就可以使用以下5种方法解决问题。方法一:开机按下F8,在出现的Windows高级启动选…...
2022/11/19 21:17:12 - 准备windows请勿关闭计算机要多久,windows10系统提示正在准备windows请勿关闭计算机怎么办...
有不少windows10系统用户反映说碰到这样一个情况,就是电脑提示正在准备windows请勿关闭计算机,碰到这样的问题该怎么解决呢,现在小编就给大家分享一下windows10系统提示正在准备windows请勿关闭计算机的具体第一种方法:1、2、依次…...
2022/11/19 21:17:11 - 配置 已完成 请勿关闭计算机,win7系统关机提示“配置Windows Update已完成30%请勿关闭计算机”的解决方法...
今天和大家分享一下win7系统重装了Win7旗舰版系统后,每次关机的时候桌面上都会显示一个“配置Windows Update的界面,提示请勿关闭计算机”,每次停留好几分钟才能正常关机,导致什么情况引起的呢?出现配置Windows Update…...
2022/11/19 21:17:10 - 电脑桌面一直是清理请关闭计算机,windows7一直卡在清理 请勿关闭计算机-win7清理请勿关机,win7配置更新35%不动...
只能是等着,别无他法。说是卡着如果你看硬盘灯应该在读写。如果从 Win 10 无法正常回滚,只能是考虑备份数据后重装系统了。解决来方案一:管理员运行cmd:net stop WuAuServcd %windir%ren SoftwareDistribution SDoldnet start WuA…...
2022/11/19 21:17:09 - 计算机配置更新不起,电脑提示“配置Windows Update请勿关闭计算机”怎么办?
原标题:电脑提示“配置Windows Update请勿关闭计算机”怎么办?win7系统中在开机与关闭的时候总是显示“配置windows update请勿关闭计算机”相信有不少朋友都曾遇到过一次两次还能忍但经常遇到就叫人感到心烦了遇到这种问题怎么办呢?一般的方…...
2022/11/19 21:17:08 - 计算机正在配置无法关机,关机提示 windows7 正在配置windows 请勿关闭计算机 ,然后等了一晚上也没有关掉。现在电脑无法正常关机...
关机提示 windows7 正在配置windows 请勿关闭计算机 ,然后等了一晚上也没有关掉。现在电脑无法正常关机以下文字资料是由(历史新知网www.lishixinzhi.com)小编为大家搜集整理后发布的内容,让我们赶快一起来看一下吧!关机提示 windows7 正在配…...
2022/11/19 21:17:05 - 钉钉提示请勿通过开发者调试模式_钉钉请勿通过开发者调试模式是真的吗好不好用...
钉钉请勿通过开发者调试模式是真的吗好不好用 更新时间:2020-04-20 22:24:19 浏览次数:729次 区域: 南阳 > 卧龙 列举网提醒您:为保障您的权益,请不要提前支付任何费用! 虚拟位置外设器!!轨迹模拟&虚拟位置外设神器 专业用于:钉钉,外勤365,红圈通,企业微信和…...
2022/11/19 21:17:05 - 配置失败还原请勿关闭计算机怎么办,win7系统出现“配置windows update失败 还原更改 请勿关闭计算机”,长时间没反应,无法进入系统的解决方案...
前几天班里有位学生电脑(windows 7系统)出问题了,具体表现是开机时一直停留在“配置windows update失败 还原更改 请勿关闭计算机”这个界面,长时间没反应,无法进入系统。这个问题原来帮其他同学也解决过,网上搜了不少资料&#x…...
2022/11/19 21:17:04 - 一个电脑无法关闭计算机你应该怎么办,电脑显示“清理请勿关闭计算机”怎么办?...
本文为你提供了3个有效解决电脑显示“清理请勿关闭计算机”问题的方法,并在最后教给你1种保护系统安全的好方法,一起来看看!电脑出现“清理请勿关闭计算机”在Windows 7(SP1)和Windows Server 2008 R2 SP1中,添加了1个新功能在“磁…...
2022/11/19 21:17:03 - 请勿关闭计算机还原更改要多久,电脑显示:配置windows更新失败,正在还原更改,请勿关闭计算机怎么办...
许多用户在长期不使用电脑的时候,开启电脑发现电脑显示:配置windows更新失败,正在还原更改,请勿关闭计算机。。.这要怎么办呢?下面小编就带着大家一起看看吧!如果能够正常进入系统,建议您暂时移…...
2022/11/19 21:17:02 - 还原更改请勿关闭计算机 要多久,配置windows update失败 还原更改 请勿关闭计算机,电脑开机后一直显示以...
配置windows update失败 还原更改 请勿关闭计算机,电脑开机后一直显示以以下文字资料是由(历史新知网www.lishixinzhi.com)小编为大家搜集整理后发布的内容,让我们赶快一起来看一下吧!配置windows update失败 还原更改 请勿关闭计算机&#x…...
2022/11/19 21:17:01 - 电脑配置中请勿关闭计算机怎么办,准备配置windows请勿关闭计算机一直显示怎么办【图解】...
不知道大家有没有遇到过这样的一个问题,就是我们的win7系统在关机的时候,总是喜欢显示“准备配置windows,请勿关机”这样的一个页面,没有什么大碍,但是如果一直等着的话就要两个小时甚至更久都关不了机,非常…...
2022/11/19 21:17:00 - 正在准备配置请勿关闭计算机,正在准备配置windows请勿关闭计算机时间长了解决教程...
当电脑出现正在准备配置windows请勿关闭计算机时,一般是您正对windows进行升级,但是这个要是长时间没有反应,我们不能再傻等下去了。可能是电脑出了别的问题了,来看看教程的说法。正在准备配置windows请勿关闭计算机时间长了方法一…...
2022/11/19 21:16:59 - 配置失败还原请勿关闭计算机,配置Windows Update失败,还原更改请勿关闭计算机...
我们使用电脑的过程中有时会遇到这种情况,当我们打开电脑之后,发现一直停留在一个界面:“配置Windows Update失败,还原更改请勿关闭计算机”,等了许久还是无法进入系统。如果我们遇到此类问题应该如何解决呢࿰…...
2022/11/19 21:16:58 - 如何在iPhone上关闭“请勿打扰”
Apple’s “Do Not Disturb While Driving” is a potentially lifesaving iPhone feature, but it doesn’t always turn on automatically at the appropriate time. For example, you might be a passenger in a moving car, but your iPhone may think you’re the one dri…...
2022/11/19 21:16:57