zookeeper节点加密_用角度通用和节点js加密cookie
zookeeper节点加密
Cookies are a ubiquitous feature of web applications, as anyone clicking GDPR notifications for the last several months has realized. Securely handling the data in those cookies is just as much a requirement as the consent notification. Encrypting your Angular and Node.js application cookies is a way to prevent unauthorized access to confidential and personal information, and it’s easy to implement.
Cookies是Web应用程序无处不在的功能,因为过去几个月中单击GDPR通知的任何人都已经意识到。 安全地处理这些cookie中的数据与同意通知一样重要。 加密Angular和Node.js应用程序cookie是一种防止未经授权访问机密和个人信息的方法,并且易于实现。
As you know, using an httpOnly cookie helps prevent cross-site scripting (XSS) attacks. (You can learn more in another post.) But what about protecting one registered user’s data against another registered user? Are cookies vulnerable to attacks from trusted users?
如您所知,使用httpOnly cookie有助于防止跨站点脚本 (XSS)攻击。 (您可以在另一篇文章中了解更多信息。)但是,如何保护一个注册用户的数据免受另一个注册用户的侵害呢? Cookies是否容易受到来自受信任用户的攻击?
This post will demonstrate how authenticated users can get unauthorized access to other users’ cookie data. It will also show you how to encrypt your cookies so the data can only be read by your code, not by users.
这篇文章将演示经过身份验证的用户如何能够未经授权访问其他用户的cookie数据。 它还将向您展示如何加密cookie,以便只能由您的代码而非用户读取数据。
The code in this post uses the cryptography library in OpenSSL to perform the encryption and decryption, but it doesn’t require you to know much about the library or cryptography to use it. You also won’t need to perform a complicated install or build process to use cryptography. (Big sigh of relief here, right?)
这篇文章中的代码使用OpenSSL中的加密库来执行加密和解密,但是使用它不需要您对库或加密有很多了解。 您也不需要执行复杂的安装或构建过程即可使用加密。 (在这里大松一口气,对吗?)
使用Angular Universal和Node.js加密Cookie的前提条件 (Prerequisites for encrypting cookies with Angular Universal and Node.js)
To accomplish the tasks in this post you will need the following:
要完成本文中的任务,您将需要以下内容:
Node.js and npm (The Node.js installation will also install npm.)
Node.js和npm (Node.js安装还将安装npm。)
Angular CLI
角度CLI
Git (For Windows users, the Git installation will also install an OpenSSL executable.)
Git (对于Windows用户,Git安装还将安装OpenSSL可执行文件。)
The EditThisCookie extension for Google Chrome
适用于Google Chrome的EditThisCookie扩展
To learn most effectively from this post you should have the following:
要从这篇文章中最有效地学习,您应该具备以下条件:
Working knowledge of TypeScript and the Angular framework
TypeScript和Angular框架的工作知识
- Familiarity with Angular observables and dependency injection 熟悉Angular可观察对象和依赖项注入
Some exposure to Angular Universal and server-side rendering (SSR)
对Angular Universal和服务器端渲染 (SSR)的一些了解
There is a companion repository for this post available on GitHub.
在GitHub上有此文章的配套存储库 。
为组件和服务创建项目和文件 (Create the project and files for the components and services)
In this step you will initialize the Angular project with npm. You will also add server-side rendering, create a sign in page, a home page, and two services.
在这一步中,您将使用npm初始化Angular项目。 您还将添加服务器端渲染,创建登录页面,主页和两个服务。
Go to the directory under which you’d like to create the project and execute the following command line instructions to initialize the project and add server-side rendering:
转到要在其下创建项目的目录,并执行以下命令行指令以初始化项目并添加服务器端渲染:
ng new encrypted-rsa-cookie-nodejs --style css --routing true
cd encrypted-rsa-cookie-nodejs
ng add @ng-toolkit/universal
npm install cookie-parser
Execute the following command line instructions to create the AuthorizationService and AuthGuardServiceservice classes:
执行以下命令行指令以创建AuthorizationService和AuthGuardService服务类:
ng g s authorization --skipTests
ng g s authGuard --skipTests
Execute the following commands to create the SigninPageComponent and ProtectedPageComponent component classes:
执行以下命令来创建SigninPageComponent和ProtectedPageComponent组件类:
ng g c signinPage --skipTests  --module app.module.ts
ng g c protectedPage --skipTests  --module app.module.ts
实施服务器和RESTful端点 (Implement the server and RESTful endpoints)
This step implements the Node.js server and the API endpoints, and it creates a couple users for demonstrating the application’s functionality. In a production application you would be validating the user sign in information against a persistent data store, like a database, and you’d be doing some cryptography with that as well so you don’t get caught storing secrets like passwords in plaintext. In this app you’ll be hard-coding them for simplicity’s sake.
此步骤实现了Node.js服务器和API端点,并创建了几个用户来演示应用程序的功能。 在生产应用程序中,您将针对持久性数据存储(例如数据库)验证用户登录信息,并且还将对其进行一些加密,因此不会被捕获以明文形式存储密码之类的机密信息。 在这个应用程序中,为简单起见,您将对其进行硬编码。
Replace contents of the server.ts file with the following TypeScript code:
用以下TypeScript代码替换server.ts文件的内容:
import 'zone.js/dist/zone-node';
import 'reflect-metadata';
import {enableProdMode} from '@angular/core';
import {ngExpressEngine} from '@nguniversal/express-engine';
import {provideModuleMap} from '@nguniversal/module-map-ngfactory-loader';
import * as express from 'express';
import * as bodyParser from 'body-parser';
import * as cors from 'cors';
import * as compression from 'compression';
import * as cookieParser from 'cookie-parser';
enableProdMode();
export const app = express();
app.use(compression());
app.use(cors());
app.use(bodyParser.json());
app.use(bodyParser.urlencoded({ extended: true }));
app.use(cookieParser());
const {AppServerModuleNgFactory, LAZY_MODULE_MAP} = require('./dist/server/main');
const users = [{ uid: '1', username: 'john', password: 'abc123', mySecret: 'I let my cat eat from my plate.' },{ uid: '2', username: 'kate', password: '123abc', mySecret: 'I let my dog sleep in my bed.'}
];
app.engine('html', ngExpressEngine({bootstrap: AppServerModuleNgFactory,providers: [provideModuleMap(LAZY_MODULE_MAP)]
}));
app.set('view engine', 'html');
app.set('views', './dist/browser');
app.post('/auth/signIn', (req, res) => {const requestedUser = users.find( user => {return user.username === req.body.username && user.password === req.body.password;});if (requestedUser) {res.cookie('authentication', requestedUser.uid, {maxAge: 2 * 60 * 60 * 60,httpOnly: true});res.status(200).send({status: 'authenticated'});} else {res.status(401).send({status: 'bad credentials'});}
});
app.get('/auth/isLogged', (req, res) => {res.status(200).send({authenticated: !!req.cookies.authentication});
});
app.get('/auth/signOut', (req, res) => {res.cookie('authentication', '', {maxAge: -1,httpOnly: true});res.status(200).send({status: 'signed out'});
});
app.get('/secretData', (req, res) => {const uid = req.cookies.authentication;res.status(200).send({secret: users.find(user => user.uid === uid).mySecret});
});
app.get('*.*', express.static('./dist/browser', {maxAge: '1y'
}));
app.get('/*', (req, res) => {res.render('index', {req, res}, (err, html) => {if (html) {res.send(html);} else {console.error(err);res.send(err);}});
});
In the code above, note the two users john and kate, and their uid values, passwords, and secrets. They’ll appear later.
在上面的代码中,请注意两个用户john和kate ,以及他们的uid值,密码和机密。 他们会在以后出现。
If you are an eagle-eyed and experienced JavaScript developer you will have noted the use of JavaScript double-negation in the /auth/isLogged endpoint. This is a way of determining the truthiness of an object. There is a Stack Overflow Q&A on the subject of not-not with extensive commentary, but the easiest — and by far the drollest — way to remember what is does was provided by Gus in 2012: “bang, bang; you’re boolean”.
如果您是一位鹰眼且经验丰富JavaScript开发人员,您将注意到/ auth / isLogged端点中使用了JavaScript双重否定。 这是确定对象真实性的一种方法。 关于这个问题,有一个堆栈溢出问答,内容不那么广泛,但有一种最简单的方法(到目前为止也是最乏味的)来记住古斯在2012年所做的事情:“砰,砰;砰! 你是布尔值”。
Also note the API endpoint responsible for user authorization: /auth/signIn. Whenever the username and password match, the code sets up an httpOnly cookie on the client side. The cookie isn’t encrypted at this point, so you’ll be able to read and change the contents with the EditThisCookie extension for Chrome.
还要注意负责用户授权的API端点: / auth / signIn 。 只要用户名和密码匹配,代码就会在客户端设置一个httpOnly cookie。 Cookie目前尚未加密,因此您可以使用适用于Chrome的EditThisCookie扩展程序来读取和更改内容。
app.post('/auth/signIn', (req, res) => {const requestedUser = users.find( user => {return user.username === req.body.username && user.password === req.body.password;});if (requestedUser) {res.cookie('authentication', requestedUser.uid, {maxAge: 2 * 60 * 60 * 60,httpOnly: true});res.status(200).send({status: 'authenticated'});} else {res.status(401).send({status: 'bad credentials'});}
});
The presence of the cookie indicates a user is signed in:
Cookie的存在指示用户已登录:
app.get('/auth/isLogged', (req, res) => {res.status(200).send({authenticated: !!req.cookies.authentication});
});
If a user signs out, all that needs to happen is to remove the authenticated user’s cookie:
如果用户退出,那么所有要做的就是删除经过身份验证的用户的cookie:
app.get('/auth/signOut', (req, res) => {res.cookie('authentication', '', {maxAge: -1,httpOnly: true});res.status(200).send({status: 'signed out'});
});
Another endpoint responds with data from the user’s record in the users array:
另一个端点使用users数组中用户记录的数据进行响应:
app.get('/secretData', (req, res) => {const uid = req.cookies.authentication;res.status(200).send({secret: users.find(user => user.uid === uid).mySecret});
});
创建组件和服务 (Create components and services)
The server’s API endpoints are going to be consumed in two places, the ProtectedPageComponent and AuthorizationService classes. The ProtectedPageComponent class displays the user data stored in the mySecret field of the users array.
服务器的API端点将在两个位置使用,即ProtectedPageComponent和AuthorizationService类。 ProtectedPageComponent类显示存储在users数组的mySecret字段中的users 。
Replace the contents of the src/app/protected-page/protected-page.component.ts file with the following TypeScript code:
用以下TypeScript代码替换src / app / protected-page / protected-page.component.ts文件的内容:
import { Component } from '@angular/core';
import { HttpClient } from '@angular/common/http';
import { Observable } from 'rxjs';
import { map } from 'rxjs/operators';
@Component({selector: 'app-protected-page',templateUrl: './protected-page.component.html',styleUrls: ['./protected-page.component.css']
})
export class ProtectedPageComponent {public mySecret: Observable<string> = this.http.get<any>('/secretData').pipe(map(resp => resp.secret));constructor(private http: HttpClient) { }
}
Replace content of the src/app/protected-page/protected-page.component.html file with following HTML markup:
用以下HTML标记替换src / app / protected-page / protected-page.component.html文件的内容:
<p>My secret is: {{mySecret | async}}
</p>
<button (click)="signOut()">Sign Out</button>
Of course, customer secrets should be available only to them. An AuthorizationService class will provide the functionality necessary to sign the user into the app and redirect them to the target URL containing the user secret: /protected-page.
当然,客户机密应该仅对他们可用。 AuthorizationService类将提供将用户登录到应用程序并将其重定向到包含用户密码的目标URL所需的功能: / protected-page 。
The class also returns two observables, one that indicates if the user is signed in, and another that sets the user’s status to ‘signed out’ and redirects them from /protected-page (or any page requiring a signed-in user) to /signin.
该类还返回两个可观察值,一个指示用户是否已登录,另一个将用户的状态设置为“已退出”,并将其从/ protected-page (或任何需要登录用户的页面)重定向到/登录 。
Replace the contents of the src/app/authorization.service.ts file with the following TypeScript code:
用以下TypeScript代码替换src / app / authorization.service.ts文件的内容:
import { Injectable, Inject, PLATFORM_ID, Optional } from '@angular/core';
import { Router } from '@angular/router';
import { HttpClient } from '@angular/common/http';
import { map, tap } from 'rxjs/operators';
import { Observable, of } from 'rxjs';
import { isPlatformServer } from '@angular/common';
import { REQUEST } from '@nguniversal/express-engine/tokens';
@Injectable({
providedIn: 'root'
})
export class AuthorizationService {private redirectUrl: string = '/';constructor(private router: Router,private http: HttpClient,@Inject(PLATFORM_ID) private platformId: any,@Optional() @Inject(REQUEST) private request: any) { }public setRedirectUrl(url: string) {this.redirectUrl = url;}public signIn(username: string, password: string): Observable<any> {return this.http.post<any>('/auth/signIn', {username: username, password: password}).pipe(tap(_ => {this.router.navigate([this.redirectUrl]);}));}public isAuthenticated(): Observable<boolean> {if (isPlatformServer(this.platformId)) {return of(this.request.cookies.authentication);}return this.http.get<any>('/auth/isLogged').pipe(map(response => response.authenticated));}public signOut(): Observable<boolean> {return this.http.get<any>('/auth/signOut').pipe(map(response => response.status === 'signed out'),tap( _ => this.router.navigate(['signin']) ));}
}
Now that the AuthorizationService class is implemented you can make use of it in the logic for a signOutbutton.
现在已经实现了AuthorizationService类,您可以在signOut按钮的逻辑中使用它。
Add the following import statement at the top of the src/app/protected-page/protected-page.component.ts file:
在src / app / protected-page / protected-page.component.ts文件的顶部添加以下导入语句:
import { AuthorizationService } from '../authorization.service';Modify the ProtectedPageComponent class constructor in the same file to read as follows:
修改同一文件中的ProtectedPageComponent类构造函数,使其内容如下:
constructor(private http: HttpClient, private authService: AuthorizationService) { }Add the following code to the bottom of the protected-page.component.ts file to implement the signOut method:
下面的代码添加到受保护的,page.component.ts文件的底部实现signOut 方法:
public signOut(): void {this.authService.signOut().subscribe();
}
The AuthorizationService class is also used by the AuthGuardService class, which you can implement now.
该AuthorizationService类也使用AuthGuardService类,你现在可以实现。
Replace contents of the src/app/auth-guard.service.ts file with this TypeScript code:
使用以下TypeScript代码替换src / app / auth-guard.service.ts文件的内容:
import { Injectable } from '@angular/core';
import { CanActivate, Router } from '@angular/router';
import { AuthorizationService } from './authorization.service';
import { Observable } from 'rxjs';
import { map } from 'rxjs/operators';
@Injectable({
providedIn: 'root'
})
export class AuthGuardService implements CanActivate {constructor(private authService: AuthorizationService, private router: Router) { }public canActivate(): Observable<boolean> {return this.authService.isAuthenticated().pipe(map(isAuth => {if (!isAuth) {this.authService.setRedirectUrl(this.router.url);this.router.navigate(['signin']);}return isAuth;}));}
}
The AuthGuardService class is used to protect routes and pages requiring a user to be authenticated and authorized in order to access them. In this application, the /home route is implemented with the ProtectedPageComponent. The AuthGuardService class implements the CanActivate interface, which enables Angular routing to invoke the service when the route is activated.
AuthGuardService类用于保护路由和页面,这些路由和页面要求对用户进行身份验证和授权才能访问它们。 在此应用程序中, / home路由是通过ProtectedPageComponent实现的。 AuthGuardService类实现CanActivate接口,该接口使Angular路由在激活路由时可以调用服务。
As you can see in the code above, whenever unauthenticated users are redirected to the /signin page.
如您在上面的代码中看到的,每当未经身份验证的用户被重定向到/ signin页面时。
Implement the /signin page by replacing the contents of src/app/signin-page/signin-page.component.ts with the following TypeScript code:
通过替换的src /应用/登入页/登入-page.component.ts用下面的打字稿代码的内容执行/登录页面:
import { Component } from '@angular/core';
import { FormGroup, FormControl } from '@angular/forms';
import { AuthorizationService } from '../authorization.service';
@Component({selector: 'app-signin-page',templateUrl: './signin-page.component.html',styleUrls: ['./signin-page.component.css']
})
export class SigninPageComponent {public signinForm: FormGroup = new FormGroup({username: new FormControl(''),password: new FormControl('')});constructor(private authService: AuthorizationService) { }public onSubmit(): void {this.authService.signIn(this.signinForm.get('username').value,this.signinForm.get('password').value).subscribe();}
}
Implement the template for the /signin page by replacing the contents of the src/app/signin-page/signin-page.component.html file with the following HTML markup:
通过使用以下HTML标记替换src / app / signin-page / signin-page.component.html文件的内容,为/ signin页面实现模板。
<form [formGroup]="signinForm" (ngSubmit)="onSubmit()"><label>Username: </label><input type="text" formControlName="username" /><br/><label>Password: </label><input type="password" formControlName="password"/><br/><input type="submit" value="Sign In" />
</form>
To work with the FormGroup object introduced in the SigninPageComponent you need to import ReactiveFormsModule in the AppModule class.
为了与工作FormGroup在介绍对象SigninPageComponent需要进口ReactiveFormsModule中AppModule类。
Insert the following import statement into the src/app/app.module.ts file:
将以下import语句插入src / app / app.module.ts文件:
import { ReactiveFormsModule } from '@angular/forms';And add it to the imports array of the @NgModule decorator as follows:
并将其添加到@NgModule装饰器的imports数组中,如下所示:
imports:[ReactiveFormsModule,CommonModule,NgtUniversalModule,TransferHttpCacheModule,HttpClientModule,AppRoutingModule
],
The services and components all come together in the application’s routing directives.
服务和组件都在应用程序的路由指令中组合在一起。
Replace the contents of the src/app/app-routing.module.ts file with the following TypeScript code:
用以下TypeScript代码替换src / app / app-routing.module.ts文件的内容:
import { NgModule } from '@angular/core';
import { Routes, RouterModule } from '@angular/router';
import { ProtectedPageComponent } from './protected-page/protected-page.component';
import { SigninPageComponent } from './signin-page/signin-page.component';
import { AuthGuardService } from './auth-guard.service';
const routes: Routes = [{ path: '', redirectTo: 'home', pathMatch: 'full' },{ path: 'signin', component: SigninPageComponent },{ path: 'home', component: ProtectedPageComponent, canActivate: [AuthGuardService] },
];
@NgModule({imports: [RouterModule.forRoot(routes)],exports: [RouterModule]
})
export class AppRoutingModule { }
Remove all the contents of the src/app/app.component.html file except the routerOutlet element:
除去src / app / app.component.html文件的所有内容,但routerOutlet元素除外:
<router-outlet></router-outlet>If you want to catch up to this step using the code from the GitHub repository, execute the following commands in the directory where you’d like to create the project directory:
如果您想使用GitHub存储库中的代码来完成此步骤,请在要创建项目目录的目录中执行以下命令:
git clone https://github.com/maciejtreder/encrypted-rsa-cookie-nodejs.git
cd encrypted-rsa-cookie-nodejs
git checkout step1
npm install
构建并测试应用程序 (Build and test the application)
To build and run the application, execute the following npm command line instructions in the encrypted-rsa-cookie-nodejs directory:
要构建和运行该应用程序,请在encrypted-rsa-cookie-nodejs目录中执行以下npm命令行说明:
npm run build:prod
npm run server
Navigate to http://localhost:8080 with your browser.
使用浏览器导航到http:// localhost:8080 。
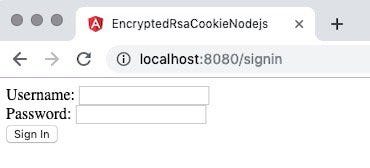
You should be redirected to the /signin page, as shown below. This demonstrates that the AuthGuardServiceand routing are working as intended.
您应该重定向到/ signin页面,如下所示。 这表明AuthGuardService和路由可以按预期工作。
Enter the credentials of the first test user (defined in the server.ts file).
输入第一个测试用户的凭据(在server.ts文件中定义)。
Username: john Password: abc123
用户名:john密码:abc123
Click the Sign In button.
单击登录按钮。
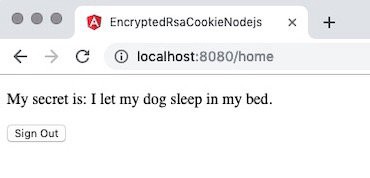
You should see a feline-related secret. This demonstrates that the user is authenticated and allowed to access the /home route and also authorized see the mySecret data for uid 1, john. The application should appear in the browser as in the illustration below:
您应该看到猫科动物相关的秘密。 这表明用户已通过身份验证并被允许访问/ home路由,并且还被授权查看uid 1,john的mySecret数据。 该应用程序应出现在浏览器中,如下图所示:

Now check Kate’s credentials.
现在检查Kate的凭据。
Click the Sign Out button and enter the credentials for uid 2.
单击“ 注销” button and enter the credentials for uid 2. button and enter the credentials for 2.
Username: kate Password: 123abc
用户名:kate密码:123abc
Click the Sign In button.
单击登录按钮。
You should see a canine-related secret. This demonstrate that the values of mySecret are being correctly retrieved based on the value of uid in the users array in the server.ts file. Your results should be similar to those shown below.
您应该看到与犬有关的秘密。 这表明,mySecret的值are being correctly retrieved based on the value of UID in the的用户array in the server.ts file. Your results should be similar to those shown below. array in the server.ts file. Your results should be similar to those shown below.
Both users need to use their credentials to see their secret data.
两个用户都需要使用其凭据来查看其秘密数据。
But can they see only their own secret data?
但是他们只能看到自己的秘密数据吗?
Examine how the /secretData endpoint in the server.ts file determines how to find the value of mySecret`:
检查server.ts文件中的/ secretData端点如何确定如何查找mySecret`的值:
app.get('/secretData', (req, res) => {let uid = req.cookies.authentication;res.status(200).send({secret: users.find(user => user.uid === uid).mySecret});
});
The server code reads the contents of the authorization cookie received with the request. Based on the value of uid, it looks for the corresponding user in the users array and returns value of the mySecret field for the user. The cookie has an httpOnly attribute, so it can’t be read by malicious JavaScript code and compromised by a hacker.
服务器代码读取与请求一起收到的授权cookie的内容。 基于uid的值,它将在users数组中寻找相应的用户,并为该users返回mySecret字段的值。 Cookie具有httpOnly属性,因此恶意JavaScript代码无法读取它,黑客也无法对其进行破坏。
But what happens if Kate signs into the application and changes her cookie value manually? You can simulate that with the EditThisCookie extension for Google Chrome.
但是,如果Kate登录到应用程序并手动更改其cookie值,会发生什么? 您可以使用适用于Google Chrome的EditThisCookie扩展程序进行模拟。
Install the EditThisCookie extension, then follow these steps with the application running:
安装EditThisCookie扩展,然后在应用程序运行时执行以下步骤:
Navigate to http://localhost:8080
导航到http:// localhost:8080
- Sign in using Kate’s credentials: username: kate, password: 123abc 使用Kate的凭据登录:用户名:kate,密码:123abc
- Click on the EditThisCookie icon in the top right corner (next to the address bar) 单击右上角(地址栏旁边)的EditThisCookie图标
Click on the
authenticationcookie and change its value from2to1单击
authenticationcookie并将其值从2更改为1- Reload the page 重新载入页面
Ooops. An unauthorized access to data! Kate is able to see the canine secret associated with John.
哎呀 未经授权访问数据! 凯特能够看到与约翰有关的犬科秘方。
加密cookie (Encrypt the cookie)
You can prevent unauthorized access to data stored in cookies with encryption. Because the cookie data won’t be shared with any other system (a third-party system or an internal system like a microservices architecture) only a private RSA key is necessary. This makes the key easy to generate and use.
您可以通过加密防止未经授权访问存储在Cookie中的数据。 因为cookie数据不会与任何其他系统(第三方系统或微服务体系结构之类的内部系统)共享,所以仅需要一个专用 RSA 密钥。 这使得密钥易于生成和使用。
Windows用户 (Windows users)
If you have installed Git, you can find the openssl.exe executable in the C:\Program Files\Git\usr\bin directory. Note that this directory may not be included in your path and you will need write access to the target directory to create the privkey.pem file. Regardless of where you generate the file, its final destination should be the encrypted-ras-cookie-nodejs directory.
如果已安装Git,则可以在C:\ Program Files \ Git \ usr \ bin目录中找到openssl.exe可执行文件 。 请注意,此目录可能不包含在您的路径中,并且您需要对目标目录具有写访问权才能创建privkey.pem文件。 无论您在何处生成文件,其最终目的地都应该是crypto-ras-cookie-nodejs目录。
macOS用户 (macOS users)
On macOS, you can install an OpenSSL by using brew package manager:
在macOS上,可以使用brew软件包管理器安装OpenSSL:
brew update
brew install openssl
echo 'export PATH="/usr/local/opt/openssl/bin:$PATH"' >> ~/.bash_profile
source ~/.bash_profile
Linux用户 (Linux users)
If you are Linux user you can install OpenSSL using the default package manager for your system. For example, Ubuntu users can use apt-get:
如果您是Linux用户,则可以使用系统的默认软件包管理器来安装OpenSSL。 例如,Ubuntu用户可以使用apt-get :
apt-get install opensslIn keeping with the preceding prerequisites for your operating system, execute the following command line instruction to generate the private RSA key:
为了符合您的操作系统的前提条件,请执行以下命令行指令以生成私有RSA密钥:
openssl genrsa -out ./privkey.pem 2048The key you generated is going to be used in the encrypt() and decrypt() methods in the server.ts file.
您生成的密钥将在server.ts文件的crypto encrypt()和decrypt()方法中使用。
Insert the following TypeScript code after the users array initialization in the server.ts file:
在users数组初始化之后,在server.ts文件中插入以下TypeScript代码:
const crypto = require('crypto');
const path = require('path');
const fs = require('fs');
const key = fs.readFileSync(path.resolve('./privkey.pem'), 'utf8');function encrypt(toEncrypt: string): string {const buffer = Buffer.from(toEncrypt);const encrypted = crypto.privateEncrypt(key, buffer);return encrypted.toString('base64');
}function decrypt(toDecrypt: string): string {const buffer = Buffer.from(toDecrypt, 'base64');const decrypted = crypto.publicDecrypt(key, buffer);return decrypted.toString('utf8');
}
Now you can change implementations of the /auth/signin and /secretData endpoints in server.ts:
现在,您可以在server.ts中更改/ auth / signin和/ secretData端点的实现:
app.post('/auth/signin', (req, res) => {const requestedUser = users.find( user => {return user.username === req.body.username && user.password === req.body.password;});if (requestedUser) {res.cookie('authentication', encrypt(requestedUser.uid), {maxAge: 2 * 60 * 60 * 60,httpOnly: true});res.status(200).send({status: 'authenticated'});} else {res.status(401).send({status: 'bad credentials'});}
});app.get('/secretData', (req, res) => {const uid = decrypt(req.cookies.authentication);res.status(200).send({secret: users.find(user => user.uid === uid).mySecret});
});
As you can see, the /auth/signin endpoint now uses the crypto library and the privkey.pem key to encrypt the value of the authentication cookie. The /secretData endpoint decrypts the value of mySecret based on the encrypted value of uid, which is highly resistant to being hacked. Only if the encrypted value of uid matches a value in the users data store is an associated value for mySecret returned.
如您所见, / auth / signin端点现在使用crypto库和privkey.pem密钥来加密authentication cookie的值。 / secretData终结mySecret基于uid的加密值解密mySecret的值,该值具有极高的抗黑客能力。 仅当uid的加密值与users数据存储中的值匹配时, mySecret返回mySecret的关联值。
If you want to catch up to this step using the code from the companion GitHub repository, execute the following command line instructions in the directory where you’d like to create the project directory:
如果您想使用随附的GitHub存储库中的代码来完成此步骤,请在您要创建项目目录的目录中执行以下命令行说明:
git clone https://github.com/maciejtreder/encrypted-rsa-cookie-nodejs.git
cd encrypted-rsa-cookie-nodejs
git checkout step2
npm install
重建并测试应用程序 (Rebuild and test the application)
To rebuild and run the application, execute the following command line instructions in the encrypted-rse-cookie-nodejs directory:
要重建并运行该应用程序,请在encrypted-rse-cookie-nodejs目录中执行以下命令行指令:
npm run build:prod
npm run server
Navigate to http://localhost:8080 with Google Chrome. Sign in using the credentials of one of the test users (john or kate). Using EditThisCookie, check the value of the authenticated cookie. You should see a string like se43zECwOjU8LAvaVl8fIqOLOzYAVTQoGZKVi2fqg54tmDaapm... in the Value field.
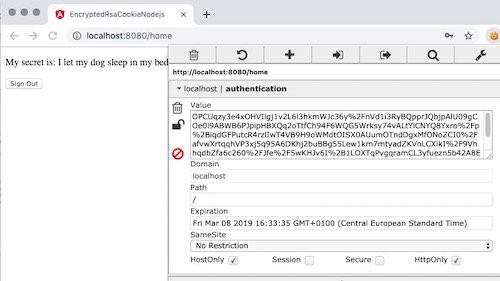
使用Google Chrome浏览到http:// localhost:8080 。 使用测试用户之一(john或kate)的凭据登录。 使用EditThisCookie,检查经过authenticated cookie的值。 您应该在“ 值”字段中看到一个字符串,例如se43zECwOjU8LAvaVl8fIqOLOzYAVTQoGZKVi2fqg54tmDaapm...
Your actual value will be determined by the encryption algorithm, so it will be different. This value is substantially more difficult to interpret and change than the 1 or 2 used when this was a plaintext field. It would be almost equally difficult to change successfully if it was an email address or an order number.
您的实际值将由加密算法确定,因此会有所不同。 与纯文本字段时使用的1或2相比,此值实质上难以解释和更改。 如果是电子邮件地址或订单号,则成功更改几乎同样困难。
The results are illustrated in the screenshot below. Note that the HttpOnly field is checked, so the cookie is still inaccessible to JavaScript running on the client.
结果在下面的屏幕快照中说明。 请注意,已选中HttpOnly字段,因此仍无法在客户端上运行JavaScript访问cookie。
Experiment with signing out as one user and signing in as another to see how the AuthGuardService class and other components govern the application’s routing.
尝试以一个用户身份AuthGuardService并以另一个用户身份登录,以查看AuthGuardService类和其他组件如何控制应用程序的路由。
Finally, note that the EditThisCookie extension for Chrome has a lot of power. You may want to disable it when you’re not using it, or uninstall it.
最后,请注意,Chrome的EditThisCookie扩展功能强大。 您可能想在不使用它时禁用它,或者将其卸载。
使用Angular Universal和Node.js加密cookie中的加密数据摘要 (Summary of encrypting data in Encrypting cookies with Angular Universal and Node.js)
Beware! Your “trusted user” might not be trustworthy.
谨防! 您的“受信任用户”可能不可信。
To protect your customers you need to consider every possible way in which the security of your application might be compromised and then implement an effective response. Storing values outside of the app in encrypted form is one of the steps which brings you closer to effective security.
为了保护您的客户,您需要考虑各种可能破坏应用程序安全性的方法,然后实施有效的响应。 将值以加密形式存储在应用程序外部是使您更接近有效安全性的步骤之一。
In this post you learned how to use an authentication cookie to restrict access to user secrets by using the data in the cookie to perform authorization functions. You saw a first-hand example of how unauthorized modification of a cookie value can result in unauthorized access to confidential data. Most importantly, you learned a technique for encrypting cookie fields to prevent unauthorized modification of their values.
在本文中,您学习了如何使用身份验证cookie通过使用cookie中的数据执行授权功能来限制对用户机密的访问。 您看到了一个第一手的示例,该示例说明了未经授权修改Cookie值如何导致未经授权访问机密数据。 最重要的是,您学习了一种加密cookie字段的技术,以防止未经授权对其值进行修改。
额外资源 (Additional resources)
For more information about security and authorization check out these previous posts on the Twilio blog:
有关安全性和授权的更多信息,请查看Twilio博客上的以下先前文章:
Build Two-factor Authentication in Angular with Twilio Authy
使用Twilio Authy在Angular中建立两因素身份验证
Building Expedited Two-Factor Authentication into Angular Apps with Authy
使用Authy将快速的两要素身份验证构建到Angular应用中
I’m Maciej Treder, contact me via contact@maciejtreder.com, https://www.maciejtreder.com or @maciejtreder on GitHub, Twitter and LinkedIn.
我马切伊Treder,通过接触我 contact@maciejtreder.com , https://www.maciejtreder.com 或@maciejtreder在 GitHub上 , Twitter的 和 LinkedIn 。
This post is originally published on the Twilio Blog.
该帖子最初发布在 Twilio博客上 。
翻译自: https://medium.com/swlh/encrypting-cookies-with-angular-universal-and-node-js-4f5ee5c65083
zookeeper节点加密
如若内容造成侵权/违法违规/事实不符,请联系编程学习网邮箱:809451989@qq.com进行投诉反馈,一经查实,立即删除!
相关文章
- Ionic实战十一:通过HmacSHA1加密对接Java系统
1.Java计算加密代码如下:public class MyClass {public static void main(String[] args){ String str "APP&1122322134534&AbcdeffFDDGHJDS"; String finalStr HmacSha1.genHMAC(str, "123456"); System.out.println("finalStr…...
2024/4/28 12:58:03 - javascript 解密_Javascript中的AES加密和Java中的解密
javascript 解密AES代表高级加密系统,它是一种对称加密算法,很多时候我们需要在客户端加密一些纯文本,例如密码,然后将其发送到服务器,然后由服务器解密以进行进一步处理.AES加密和解密更加容易在相同的平台࿰…...
2024/4/28 15:26:55 - 对Url传输参数进行加密和解密
最近做一个论坛入口时要实现帐号和密码不在IE地址栏出现而做的 index.aspx.cs (加密处理)Byte[] Iv64{11, 22, 33, 44, 55, 66, 77, 85};Byte[] byKey64{10, 20, 30, 40, 50, 60, 70, 80};public string Encrypt(string strText){ try { DESCryptoServiceProvider des n…...
2024/4/27 22:55:49 - Javascript中的AES加密和Java中的解密
AES代表高级加密系统,它是一种对称加密算法,很多时候我们需要在客户端加密一些纯文本(例如密码)并将其发送到服务器,然后由服务器解密以进行进一步处理.AES加密和解密更加容易在相同的平台(例如Android客户…...
2024/4/27 23:07:35 - [Angular2+]一步步搭建脚手架之登录逻辑(token/observable/Rxjs/httpclient/md5加密/模块化/异步等)
目录 base-config.ts 在app.html user.service home.ts user.ts 前期 需要掌握的知识 Rxjs,ES6,TS Obserable这块重点掌握,不然看不懂就GG了 公司开发的登录逻辑后期还不清楚,前期是url密码成功后返回带有token的json 用这个token直接连接url》u…...
2024/4/28 21:04:24 - 5年后双眼皮还能修复
...
2024/4/28 1:25:40 - 23岁双眼皮下榻怎么办
...
2024/4/28 4:50:57 - Yii2.0 后台UI框架以及权限管理扩展实现权限菜单管理
Yii2.0 后台UI框架以及权限管理扩展实现权限菜单管理一、安装后台框架ui二、安装权限管理扩展三、实现权限菜单管理一、安装后台框架ui composer require dmstr/yii2-adminlte-asset复制 \vendor\dmstr\yii2-adminlte-asset\example-views\yiisoft\yii2-app\ 目录的 layouts、…...
2024/4/28 13:10:13 - yii2.0高级版本框架搭建
1. 使用composer 将框架下载下来composer create-project --prefer-dist yiisoft/yii2-app-advanced yii-application(项目名称) 2.打开控制台终端,执行init命令并选择dev为环境。/path/to/php-bin/php /path/to/yii-application/init3.配置数…...
2024/4/27 22:32:39 - Yii2.0 数据库查询
Yii2.0 数据库查询 [ 2.0 版本 ] 下面介绍一下 Yii2.0 对数据库 查询的一些简单的操作 User::find()->all(); 此方法返回所有数据;User::findOne($id); 此方法返回 主键 id1 的一条数据(举个例子); User::find()->where([name > 小伙儿]…...
2024/4/20 16:41:53 - yii2.0 定时任务
控制台路径: wallService/console/controllers/PushController.php 方法: 定时任务命令: php yii push/update-subject-status //调试命令 linux 下命令: */1 * * * * * /usr/local/php/bin/php /data/wwwroot/wallService/…...
2024/4/20 16:41:51 - 15. Yii 2.0 页面缓存
页面缓存是将整个静态页面(一般是首页)进行缓存,也比较常用,一般采用 File 作为缓存介质。页面缓存是将整个控制器方法的输出(整个页面),利用缓存介质缓存起来,页面缓存生效期间&…...
2024/4/20 16:41:51 - Yii2.0打造完整电商平台
var 课程地址 "http://icourse8.com/yii2fangJD.html";let 前往下载 "http://icourse8.com/yii2fangJD.html"复制代码目录详情第1章 课程简介 第2章 项目的准备工作 第3章 项目前台页面的搭建 第4章 项目后台页面的搭建 第5章 管理员模块的开发 第6章 会…...
2024/4/20 16:41:49 - yii2.0 错误处理
在config.php里配置//错误处理errorHandler > [errorAction > site/error,],随后在site控制器的error方法写$exception \Yii::$app->errorHandler->exception;if ($exception ! null) {\AppHelper::returnClient($exception->statusCode);}转载于:https://blog…...
2024/4/26 19:30:33 - Yii2.0 前后端分离 前端ajax调用跨域的问题
Yii2.0有自己的一套防止跨域调用的机制,网上一搜一大把的解决方式,无非就是: use yii\filters\Cors; public function behaviors() {return ArrayHelper::merge([[class > Cors::className(),cors > [Origin > [http://www.myserv…...
2024/4/20 16:41:47 - yii2.0 gii 配置
yii2.0 Gii的正确配置 默认路径是在:config/main.php modules >[gii > [class > yii\gii\Module,//自定义允许访问gii模块的ip或者ip段allowedIPs > [127.0.0.1, ::1, 192.168.0.*] ],],如果配置成 gii > [class > yii\gii\Module,//自定义允许…...
2024/4/20 16:41:50 - YII2.0高级版验证码
关于YII框架的验证码 Model层demo 控制器demo 视图层demo 这时候就大功告成了!!!...
2024/4/20 16:41:45 - Yii 2.0 搭建基于RBAC权限的后台管理系统 (一)
Yii 2.0搭建RBAC的一些笔记整理了一下发来和大家分享下。 完整项目请移步:https://github.com/Loren1999/Yii-RBAC-AdminLTE 一、安装PHP依赖管理工具 composer 2. 下载composer到xampp的PHP目录下 找到并进入 PHP 的安装目录(和你在命令行中执行的 …...
2024/4/21 11:58:27 - YII2.0框架设置缓存时间
$cache Yii::$app->cache; //获取缓存数据 $data $cache->get(cacheKey); //cacheKey为缓存Key//设置缓存数据$cache->set(cacheKey,$Data,60); //第一个参数:缓存key,可以自己设置,也可以加密生成//第二个参数:要缓存的数据//第三个参数:缓存的时间,默认为0,表示永…...
2024/4/21 11:58:26 - YII2.0生成RBAC权限表
在控制台配置文件组件配置添加权限管理组件如下: ‘authManager’ > [ ‘class’ > ‘yii\rbac\DbManager’, ‘itemTable’ > ‘{{%auth_item}}’, ‘itemChildTable’ > ‘{{%auth_item_child}}’, ‘assignmentTable’ > ‘{{%auth_assignme…...
2024/4/21 11:58:25
最新文章
- 接口的构成
目录 接口 一、URL 二、请求方法 三、请求报文(request message) 3.1请求行 3.2请求头 3.3 请求体 四、响应报文(response message) 4.1响应行 4.2响应头 4.3响应体 接口 接口就是API,是程序开发的函数和方…...
2024/4/28 21:12:33 - 梯度消失和梯度爆炸的一些处理方法
在这里是记录一下梯度消失或梯度爆炸的一些处理技巧。全当学习总结了如有错误还请留言,在此感激不尽。 权重和梯度的更新公式如下: w w − η ⋅ ∇ w w w - \eta \cdot \nabla w ww−η⋅∇w 个人通俗的理解梯度消失就是网络模型在反向求导的时候出…...
2024/3/20 10:50:27 - 将.docx格式文件转成html,uniapp使用u-parse展示
使用mammoth。 1、在index.html中加入: <!DOCTYPE html> <html lang"en"><head><meta charset"UTF-8" /><meta http-equiv"X-UA-Compatible" content"IEedge" /><meta name"viewp…...
2024/4/27 8:45:30 - Docker Desktop+WSL2安装到自定义路径
现在大多数软件实在太“流氓”了,在安装过程中,根本不让你选择安装路径,默认安装到$HOME下(windows C盘),随着软件的使用增多,可能磁盘空间不够,这个时候就想着,看看某些…...
2024/4/27 13:24:41 - spark on hive
由于spark不存在元数据管理模块,为了能方便地通过sql操作hdfs数据,我们可以通过借助hive的元数据管理模块实现。对于hive来说,核心组件包含两个: sql优化翻译器,翻译sql到mapreduce并提交到yarn执行metastore…...
2024/4/27 18:57:26 - 【外汇早评】美通胀数据走低,美元调整
原标题:【外汇早评】美通胀数据走低,美元调整昨日美国方面公布了新一期的核心PCE物价指数数据,同比增长1.6%,低于前值和预期值的1.7%,距离美联储的通胀目标2%继续走低,通胀压力较低,且此前美国一季度GDP初值中的消费部分下滑明显,因此市场对美联储后续更可能降息的政策…...
2024/4/28 13:52:11 - 【原油贵金属周评】原油多头拥挤,价格调整
原标题:【原油贵金属周评】原油多头拥挤,价格调整本周国际劳动节,我们喜迎四天假期,但是整个金融市场确实流动性充沛,大事频发,各个商品波动剧烈。美国方面,在本周四凌晨公布5月份的利率决议和新闻发布会,维持联邦基金利率在2.25%-2.50%不变,符合市场预期。同时美联储…...
2024/4/28 3:28:32 - 【外汇周评】靓丽非农不及疲软通胀影响
原标题:【外汇周评】靓丽非农不及疲软通胀影响在刚结束的周五,美国方面公布了新一期的非农就业数据,大幅好于前值和预期,新增就业重新回到20万以上。具体数据: 美国4月非农就业人口变动 26.3万人,预期 19万人,前值 19.6万人。 美国4月失业率 3.6%,预期 3.8%,前值 3…...
2024/4/26 23:05:52 - 【原油贵金属早评】库存继续增加,油价收跌
原标题:【原油贵金属早评】库存继续增加,油价收跌周三清晨公布美国当周API原油库存数据,上周原油库存增加281万桶至4.692亿桶,增幅超过预期的74.4万桶。且有消息人士称,沙特阿美据悉将于6月向亚洲炼油厂额外出售更多原油,印度炼油商预计将每日获得至多20万桶的额外原油供…...
2024/4/28 13:51:37 - 【外汇早评】日本央行会议纪要不改日元强势
原标题:【外汇早评】日本央行会议纪要不改日元强势近两日日元大幅走强与近期市场风险情绪上升,避险资金回流日元有关,也与前一段时间的美日贸易谈判给日本缓冲期,日本方面对汇率问题也避免继续贬值有关。虽然今日早间日本央行公布的利率会议纪要仍然是支持宽松政策,但这符…...
2024/4/27 17:58:04 - 【原油贵金属早评】欧佩克稳定市场,填补伊朗问题的影响
原标题:【原油贵金属早评】欧佩克稳定市场,填补伊朗问题的影响近日伊朗局势升温,导致市场担忧影响原油供给,油价试图反弹。此时OPEC表态稳定市场。据消息人士透露,沙特6月石油出口料将低于700万桶/日,沙特已经收到石油消费国提出的6月份扩大出口的“适度要求”,沙特将满…...
2024/4/27 14:22:49 - 【外汇早评】美欲与伊朗重谈协议
原标题:【外汇早评】美欲与伊朗重谈协议美国对伊朗的制裁遭到伊朗的抗议,昨日伊朗方面提出将部分退出伊核协议。而此行为又遭到欧洲方面对伊朗的谴责和警告,伊朗外长昨日回应称,欧洲国家履行它们的义务,伊核协议就能保证存续。据传闻伊朗的导弹已经对准了以色列和美国的航…...
2024/4/28 1:28:33 - 【原油贵金属早评】波动率飙升,市场情绪动荡
原标题:【原油贵金属早评】波动率飙升,市场情绪动荡因中美贸易谈判不安情绪影响,金融市场各资产品种出现明显的波动。随着美国与中方开启第十一轮谈判之际,美国按照既定计划向中国2000亿商品征收25%的关税,市场情绪有所平复,已经开始接受这一事实。虽然波动率-恐慌指数VI…...
2024/4/28 15:57:13 - 【原油贵金属周评】伊朗局势升温,黄金多头跃跃欲试
原标题:【原油贵金属周评】伊朗局势升温,黄金多头跃跃欲试美国和伊朗的局势继续升温,市场风险情绪上升,避险黄金有向上突破阻力的迹象。原油方面稍显平稳,近期美国和OPEC加大供给及市场需求回落的影响,伊朗局势并未推升油价走强。近期中美贸易谈判摩擦再度升级,美国对中…...
2024/4/27 17:59:30 - 【原油贵金属早评】市场情绪继续恶化,黄金上破
原标题:【原油贵金属早评】市场情绪继续恶化,黄金上破周初中国针对于美国加征关税的进行的反制措施引发市场情绪的大幅波动,人民币汇率出现大幅的贬值动能,金融市场受到非常明显的冲击。尤其是波动率起来之后,对于股市的表现尤其不安。隔夜美国股市出现明显的下行走势,这…...
2024/4/25 18:39:16 - 【外汇早评】美伊僵持,风险情绪继续升温
原标题:【外汇早评】美伊僵持,风险情绪继续升温昨日沙特两艘油轮再次发生爆炸事件,导致波斯湾局势进一步恶化,市场担忧美伊可能会出现摩擦生火,避险品种获得支撑,黄金和日元大幅走强。美指受中美贸易问题影响而在低位震荡。继5月12日,四艘商船在阿联酋领海附近的阿曼湾、…...
2024/4/28 1:34:08 - 【原油贵金属早评】贸易冲突导致需求低迷,油价弱势
原标题:【原油贵金属早评】贸易冲突导致需求低迷,油价弱势近日虽然伊朗局势升温,中东地区几起油船被袭击事件影响,但油价并未走高,而是出于调整结构中。由于市场预期局势失控的可能性较低,而中美贸易问题导致的全球经济衰退风险更大,需求会持续低迷,因此油价调整压力较…...
2024/4/26 19:03:37 - 氧生福地 玩美北湖(上)——为时光守候两千年
原标题:氧生福地 玩美北湖(上)——为时光守候两千年一次说走就走的旅行,只有一张高铁票的距离~ 所以,湖南郴州,我来了~ 从广州南站出发,一个半小时就到达郴州西站了。在动车上,同时改票的南风兄和我居然被分到了一个车厢,所以一路非常愉快地聊了过来。 挺好,最起…...
2024/4/28 1:22:35 - 氧生福地 玩美北湖(中)——永春梯田里的美与鲜
原标题:氧生福地 玩美北湖(中)——永春梯田里的美与鲜一觉醒来,因为大家太爱“美”照,在柳毅山庄去寻找龙女而错过了早餐时间。近十点,向导坏坏还是带着饥肠辘辘的我们去吃郴州最富有盛名的“鱼头粉”。说这是“十二分推荐”,到郴州必吃的美食之一。 哇塞!那个味美香甜…...
2024/4/25 18:39:14 - 氧生福地 玩美北湖(下)——奔跑吧骚年!
原标题:氧生福地 玩美北湖(下)——奔跑吧骚年!让我们红尘做伴 活得潇潇洒洒 策马奔腾共享人世繁华 对酒当歌唱出心中喜悦 轰轰烈烈把握青春年华 让我们红尘做伴 活得潇潇洒洒 策马奔腾共享人世繁华 对酒当歌唱出心中喜悦 轰轰烈烈把握青春年华 啊……啊……啊 两…...
2024/4/26 23:04:58 - 扒开伪装医用面膜,翻六倍价格宰客,小姐姐注意了!
原标题:扒开伪装医用面膜,翻六倍价格宰客,小姐姐注意了!扒开伪装医用面膜,翻六倍价格宰客!当行业里的某一品项火爆了,就会有很多商家蹭热度,装逼忽悠,最近火爆朋友圈的医用面膜,被沾上了污点,到底怎么回事呢? “比普通面膜安全、效果好!痘痘、痘印、敏感肌都能用…...
2024/4/27 23:24:42 - 「发现」铁皮石斛仙草之神奇功效用于医用面膜
原标题:「发现」铁皮石斛仙草之神奇功效用于医用面膜丽彦妆铁皮石斛医用面膜|石斛多糖无菌修护补水贴19大优势: 1、铁皮石斛:自唐宋以来,一直被列为皇室贡品,铁皮石斛生于海拔1600米的悬崖峭壁之上,繁殖力差,产量极低,所以古代仅供皇室、贵族享用 2、铁皮石斛自古民间…...
2024/4/28 5:48:52 - 丽彦妆\医用面膜\冷敷贴轻奢医学护肤引导者
原标题:丽彦妆\医用面膜\冷敷贴轻奢医学护肤引导者【公司简介】 广州华彬企业隶属香港华彬集团有限公司,专注美业21年,其旗下品牌: 「圣茵美」私密荷尔蒙抗衰,产后修复 「圣仪轩」私密荷尔蒙抗衰,产后修复 「花茵莳」私密荷尔蒙抗衰,产后修复 「丽彦妆」专注医学护…...
2024/4/26 19:46:12 - 广州械字号面膜生产厂家OEM/ODM4项须知!
原标题:广州械字号面膜生产厂家OEM/ODM4项须知!广州械字号面膜生产厂家OEM/ODM流程及注意事项解读: 械字号医用面膜,其实在我国并没有严格的定义,通常我们说的医美面膜指的应该是一种「医用敷料」,也就是说,医用面膜其实算作「医疗器械」的一种,又称「医用冷敷贴」。 …...
2024/4/27 11:43:08 - 械字号医用眼膜缓解用眼过度到底有无作用?
原标题:械字号医用眼膜缓解用眼过度到底有无作用?医用眼膜/械字号眼膜/医用冷敷眼贴 凝胶层为亲水高分子材料,含70%以上的水分。体表皮肤温度传导到本产品的凝胶层,热量被凝胶内水分子吸收,通过水分的蒸发带走大量的热量,可迅速地降低体表皮肤局部温度,减轻局部皮肤的灼…...
2024/4/27 8:32:30 - 配置失败还原请勿关闭计算机,电脑开机屏幕上面显示,配置失败还原更改 请勿关闭计算机 开不了机 这个问题怎么办...
解析如下:1、长按电脑电源键直至关机,然后再按一次电源健重启电脑,按F8健进入安全模式2、安全模式下进入Windows系统桌面后,按住“winR”打开运行窗口,输入“services.msc”打开服务设置3、在服务界面,选中…...
2022/11/19 21:17:18 - 错误使用 reshape要执行 RESHAPE,请勿更改元素数目。
%读入6幅图像(每一幅图像的大小是564*564) f1 imread(WashingtonDC_Band1_564.tif); subplot(3,2,1),imshow(f1); f2 imread(WashingtonDC_Band2_564.tif); subplot(3,2,2),imshow(f2); f3 imread(WashingtonDC_Band3_564.tif); subplot(3,2,3),imsho…...
2022/11/19 21:17:16 - 配置 已完成 请勿关闭计算机,win7系统关机提示“配置Windows Update已完成30%请勿关闭计算机...
win7系统关机提示“配置Windows Update已完成30%请勿关闭计算机”问题的解决方法在win7系统关机时如果有升级系统的或者其他需要会直接进入一个 等待界面,在等待界面中我们需要等待操作结束才能关机,虽然这比较麻烦,但是对系统进行配置和升级…...
2022/11/19 21:17:15 - 台式电脑显示配置100%请勿关闭计算机,“准备配置windows 请勿关闭计算机”的解决方法...
有不少用户在重装Win7系统或更新系统后会遇到“准备配置windows,请勿关闭计算机”的提示,要过很久才能进入系统,有的用户甚至几个小时也无法进入,下面就教大家这个问题的解决方法。第一种方法:我们首先在左下角的“开始…...
2022/11/19 21:17:14 - win7 正在配置 请勿关闭计算机,怎么办Win7开机显示正在配置Windows Update请勿关机...
置信有很多用户都跟小编一样遇到过这样的问题,电脑时发现开机屏幕显现“正在配置Windows Update,请勿关机”(如下图所示),而且还需求等大约5分钟才干进入系统。这是怎样回事呢?一切都是正常操作的,为什么开时机呈现“正…...
2022/11/19 21:17:13 - 准备配置windows 请勿关闭计算机 蓝屏,Win7开机总是出现提示“配置Windows请勿关机”...
Win7系统开机启动时总是出现“配置Windows请勿关机”的提示,没过几秒后电脑自动重启,每次开机都这样无法进入系统,此时碰到这种现象的用户就可以使用以下5种方法解决问题。方法一:开机按下F8,在出现的Windows高级启动选…...
2022/11/19 21:17:12 - 准备windows请勿关闭计算机要多久,windows10系统提示正在准备windows请勿关闭计算机怎么办...
有不少windows10系统用户反映说碰到这样一个情况,就是电脑提示正在准备windows请勿关闭计算机,碰到这样的问题该怎么解决呢,现在小编就给大家分享一下windows10系统提示正在准备windows请勿关闭计算机的具体第一种方法:1、2、依次…...
2022/11/19 21:17:11 - 配置 已完成 请勿关闭计算机,win7系统关机提示“配置Windows Update已完成30%请勿关闭计算机”的解决方法...
今天和大家分享一下win7系统重装了Win7旗舰版系统后,每次关机的时候桌面上都会显示一个“配置Windows Update的界面,提示请勿关闭计算机”,每次停留好几分钟才能正常关机,导致什么情况引起的呢?出现配置Windows Update…...
2022/11/19 21:17:10 - 电脑桌面一直是清理请关闭计算机,windows7一直卡在清理 请勿关闭计算机-win7清理请勿关机,win7配置更新35%不动...
只能是等着,别无他法。说是卡着如果你看硬盘灯应该在读写。如果从 Win 10 无法正常回滚,只能是考虑备份数据后重装系统了。解决来方案一:管理员运行cmd:net stop WuAuServcd %windir%ren SoftwareDistribution SDoldnet start WuA…...
2022/11/19 21:17:09 - 计算机配置更新不起,电脑提示“配置Windows Update请勿关闭计算机”怎么办?
原标题:电脑提示“配置Windows Update请勿关闭计算机”怎么办?win7系统中在开机与关闭的时候总是显示“配置windows update请勿关闭计算机”相信有不少朋友都曾遇到过一次两次还能忍但经常遇到就叫人感到心烦了遇到这种问题怎么办呢?一般的方…...
2022/11/19 21:17:08 - 计算机正在配置无法关机,关机提示 windows7 正在配置windows 请勿关闭计算机 ,然后等了一晚上也没有关掉。现在电脑无法正常关机...
关机提示 windows7 正在配置windows 请勿关闭计算机 ,然后等了一晚上也没有关掉。现在电脑无法正常关机以下文字资料是由(历史新知网www.lishixinzhi.com)小编为大家搜集整理后发布的内容,让我们赶快一起来看一下吧!关机提示 windows7 正在配…...
2022/11/19 21:17:05 - 钉钉提示请勿通过开发者调试模式_钉钉请勿通过开发者调试模式是真的吗好不好用...
钉钉请勿通过开发者调试模式是真的吗好不好用 更新时间:2020-04-20 22:24:19 浏览次数:729次 区域: 南阳 > 卧龙 列举网提醒您:为保障您的权益,请不要提前支付任何费用! 虚拟位置外设器!!轨迹模拟&虚拟位置外设神器 专业用于:钉钉,外勤365,红圈通,企业微信和…...
2022/11/19 21:17:05 - 配置失败还原请勿关闭计算机怎么办,win7系统出现“配置windows update失败 还原更改 请勿关闭计算机”,长时间没反应,无法进入系统的解决方案...
前几天班里有位学生电脑(windows 7系统)出问题了,具体表现是开机时一直停留在“配置windows update失败 还原更改 请勿关闭计算机”这个界面,长时间没反应,无法进入系统。这个问题原来帮其他同学也解决过,网上搜了不少资料&#x…...
2022/11/19 21:17:04 - 一个电脑无法关闭计算机你应该怎么办,电脑显示“清理请勿关闭计算机”怎么办?...
本文为你提供了3个有效解决电脑显示“清理请勿关闭计算机”问题的方法,并在最后教给你1种保护系统安全的好方法,一起来看看!电脑出现“清理请勿关闭计算机”在Windows 7(SP1)和Windows Server 2008 R2 SP1中,添加了1个新功能在“磁…...
2022/11/19 21:17:03 - 请勿关闭计算机还原更改要多久,电脑显示:配置windows更新失败,正在还原更改,请勿关闭计算机怎么办...
许多用户在长期不使用电脑的时候,开启电脑发现电脑显示:配置windows更新失败,正在还原更改,请勿关闭计算机。。.这要怎么办呢?下面小编就带着大家一起看看吧!如果能够正常进入系统,建议您暂时移…...
2022/11/19 21:17:02 - 还原更改请勿关闭计算机 要多久,配置windows update失败 还原更改 请勿关闭计算机,电脑开机后一直显示以...
配置windows update失败 还原更改 请勿关闭计算机,电脑开机后一直显示以以下文字资料是由(历史新知网www.lishixinzhi.com)小编为大家搜集整理后发布的内容,让我们赶快一起来看一下吧!配置windows update失败 还原更改 请勿关闭计算机&#x…...
2022/11/19 21:17:01 - 电脑配置中请勿关闭计算机怎么办,准备配置windows请勿关闭计算机一直显示怎么办【图解】...
不知道大家有没有遇到过这样的一个问题,就是我们的win7系统在关机的时候,总是喜欢显示“准备配置windows,请勿关机”这样的一个页面,没有什么大碍,但是如果一直等着的话就要两个小时甚至更久都关不了机,非常…...
2022/11/19 21:17:00 - 正在准备配置请勿关闭计算机,正在准备配置windows请勿关闭计算机时间长了解决教程...
当电脑出现正在准备配置windows请勿关闭计算机时,一般是您正对windows进行升级,但是这个要是长时间没有反应,我们不能再傻等下去了。可能是电脑出了别的问题了,来看看教程的说法。正在准备配置windows请勿关闭计算机时间长了方法一…...
2022/11/19 21:16:59 - 配置失败还原请勿关闭计算机,配置Windows Update失败,还原更改请勿关闭计算机...
我们使用电脑的过程中有时会遇到这种情况,当我们打开电脑之后,发现一直停留在一个界面:“配置Windows Update失败,还原更改请勿关闭计算机”,等了许久还是无法进入系统。如果我们遇到此类问题应该如何解决呢࿰…...
2022/11/19 21:16:58 - 如何在iPhone上关闭“请勿打扰”
Apple’s “Do Not Disturb While Driving” is a potentially lifesaving iPhone feature, but it doesn’t always turn on automatically at the appropriate time. For example, you might be a passenger in a moving car, but your iPhone may think you’re the one dri…...
2022/11/19 21:16:57